Introduction
Github is a code sharing website often used by digital historians. ‘Git’ is a program that takes snapshots of the current state of a folder, and stores them in sequence, allowing you to revert your changes to an earlier state. It also allows you to create branches, or duplicates of your folder, so you can experiment. If you like the results of your work, you can merge that branch back into your original.
Github therefore is a hub for sharing these git snapshots.
A branch (a copy, a duplicate) of your work uploaded to Github could therefore be copied to say my account (a fork); then I might download to my machine to work on it (I’ve pulled it). Once I’m happy with my changes, I commit them (save them to the sequence of changes that Git tracks), and then I could push those changes to the fork in my account. I would then send you a pull notice, asking you to pull my changes back to your account; you could then decide whether or not to merge.
I might sometimes fork your work, pull it down onto my machine, make changes that I commit, push it back online, and ask you to pull the changes back. But that won’t happen very often. It takes a while to get comfortable with this.
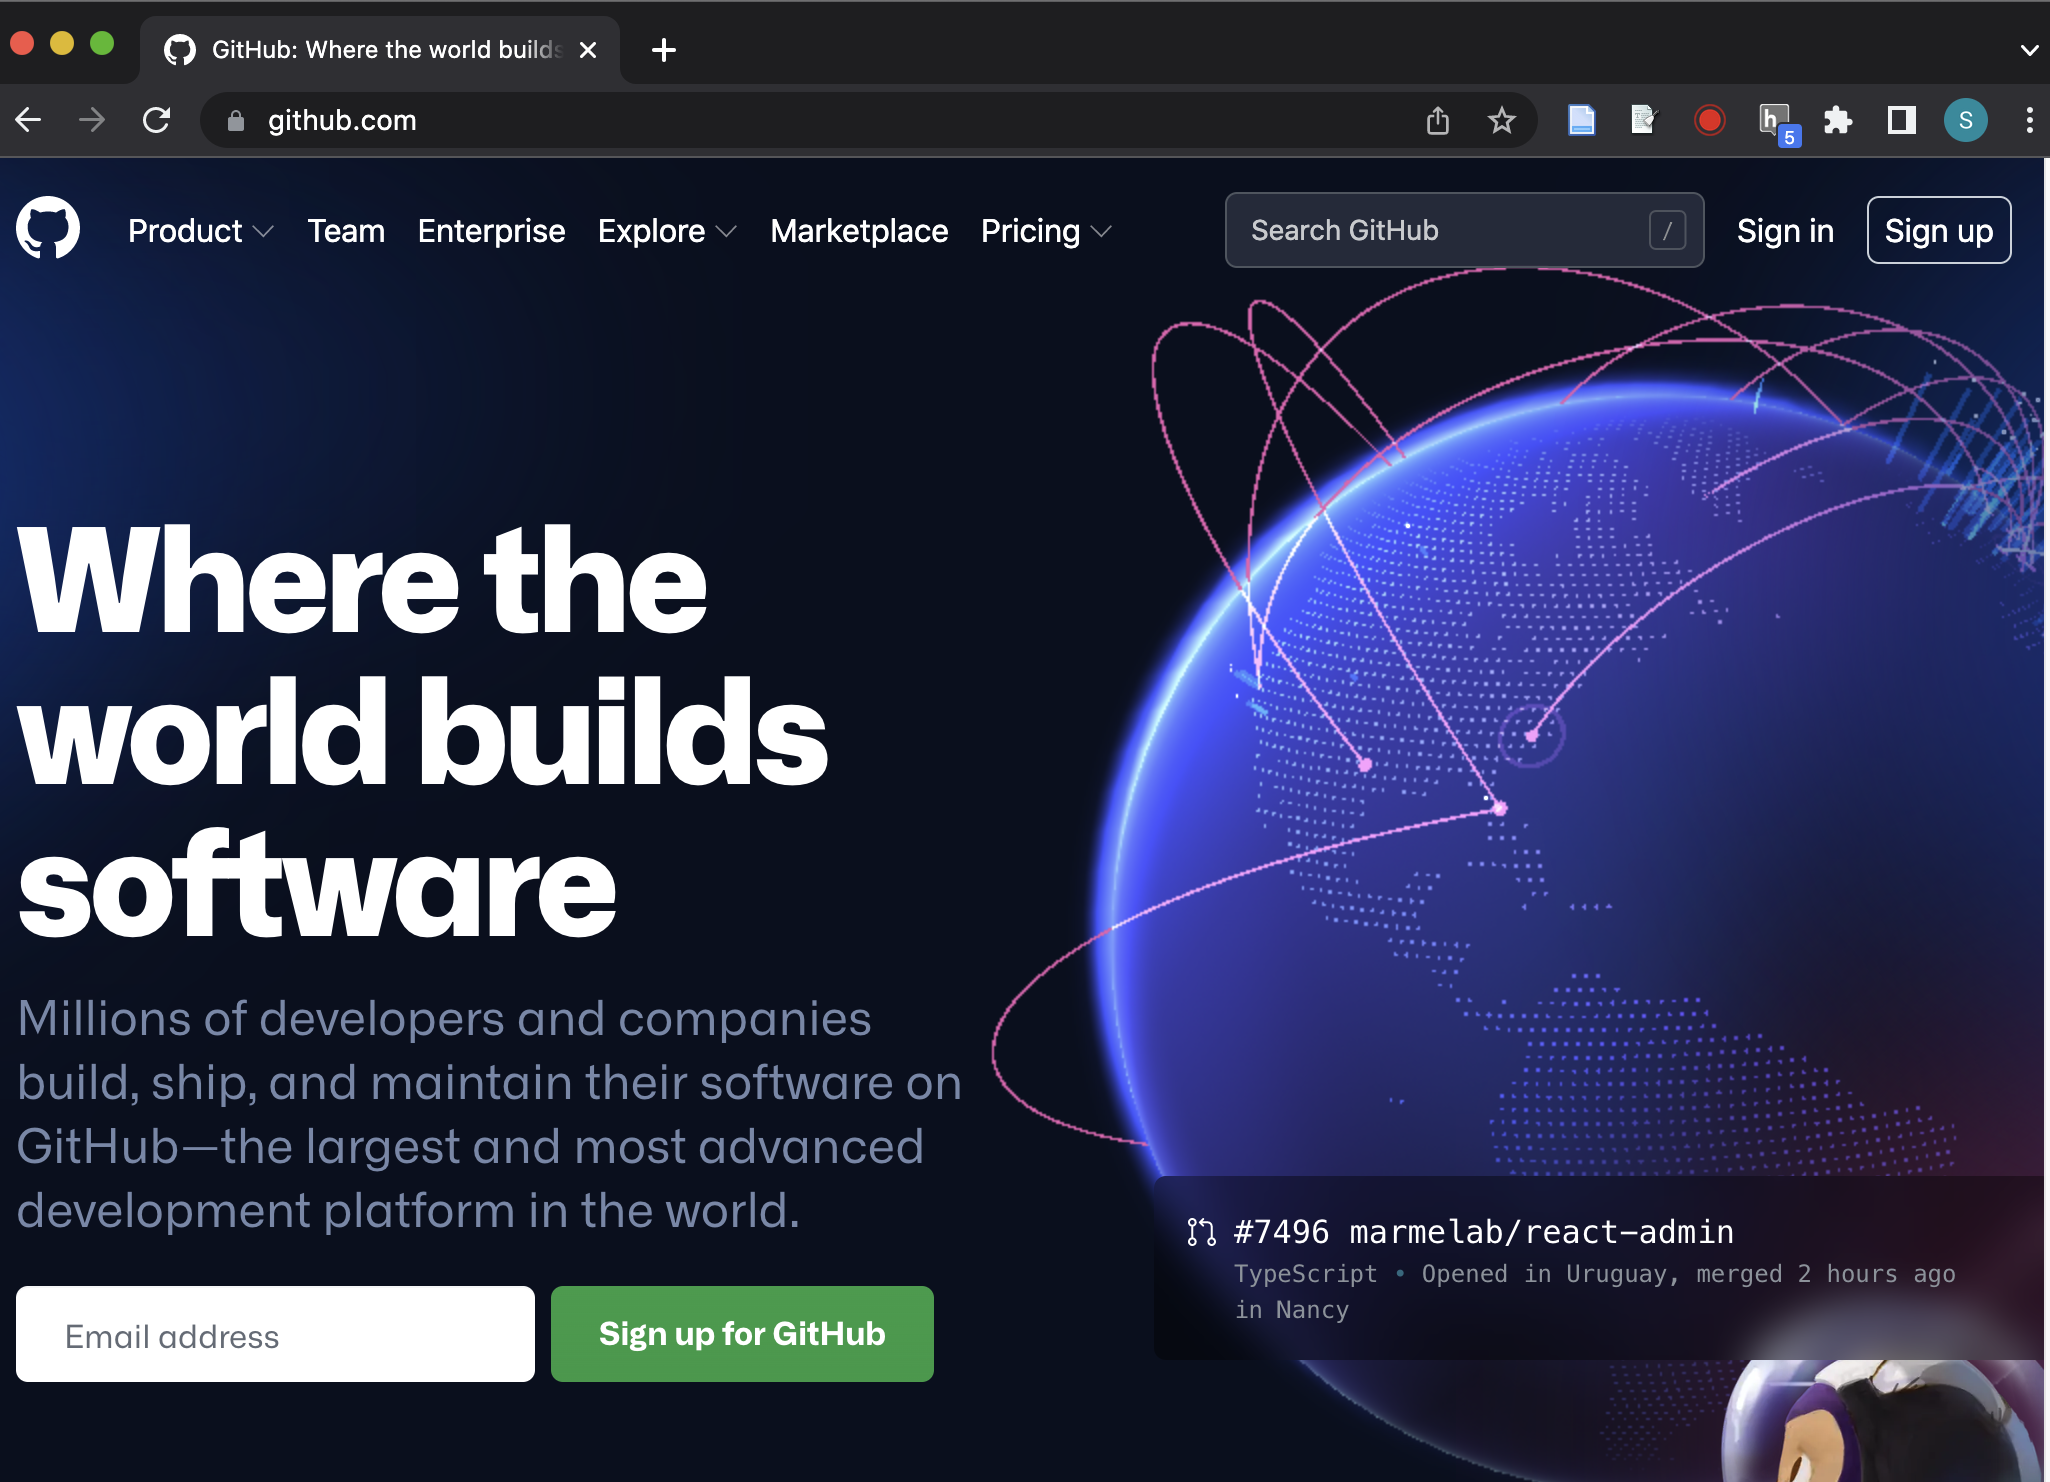
Get your account
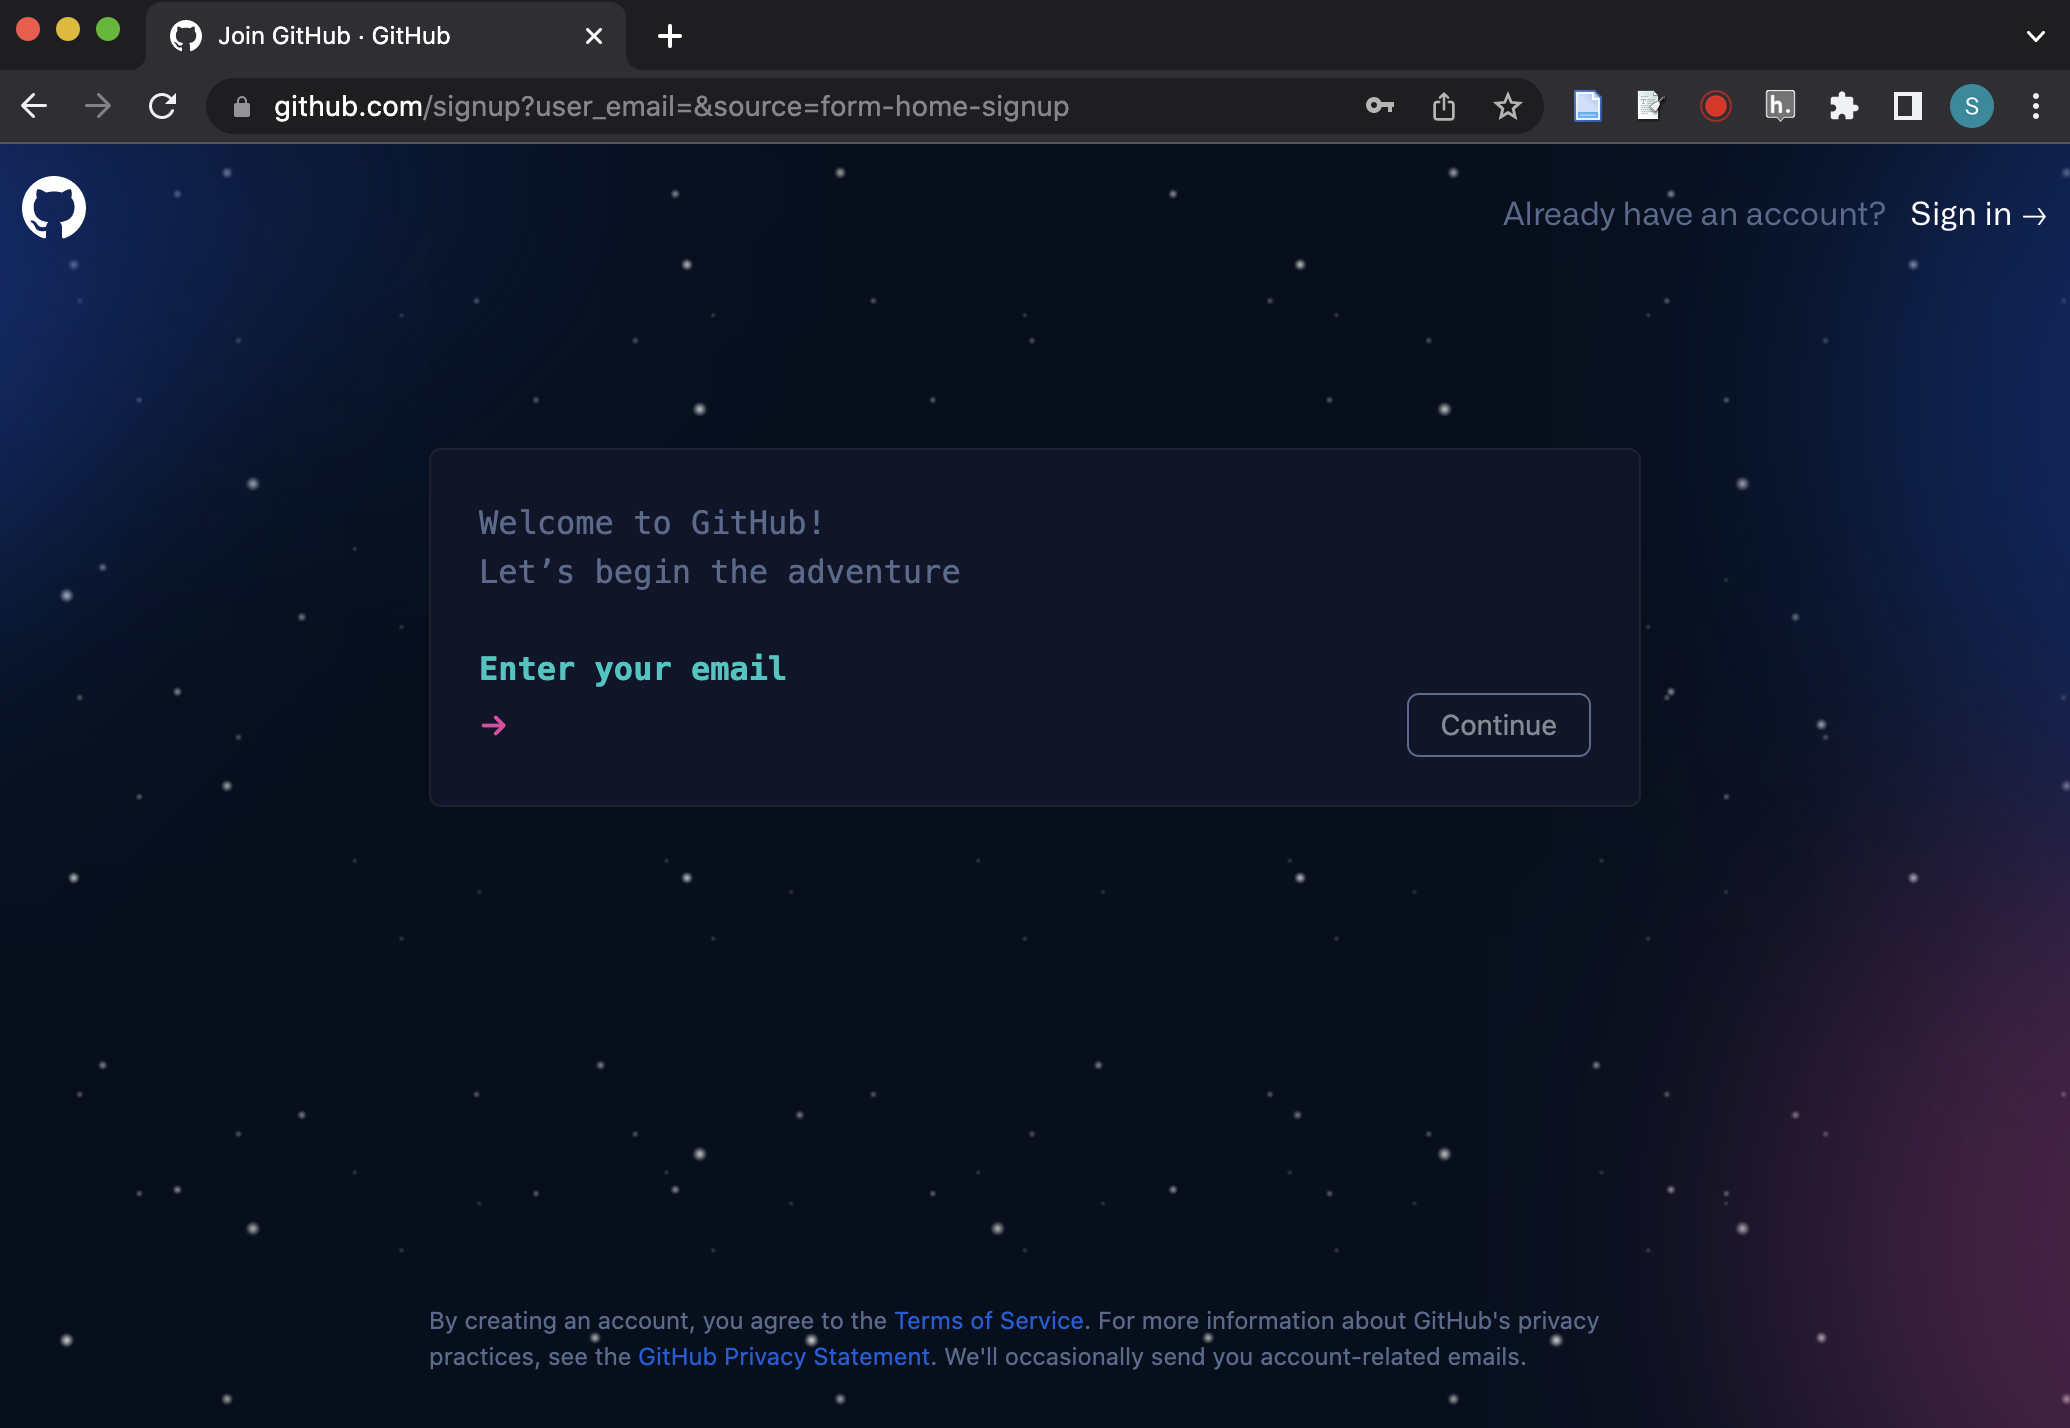
- Go to github.com and sign up for an account. You don’t have to use your real name. (Protip: You might want to set up an email just for signing up for things). Enter your email address in the white email address box and hit the green sign up button.
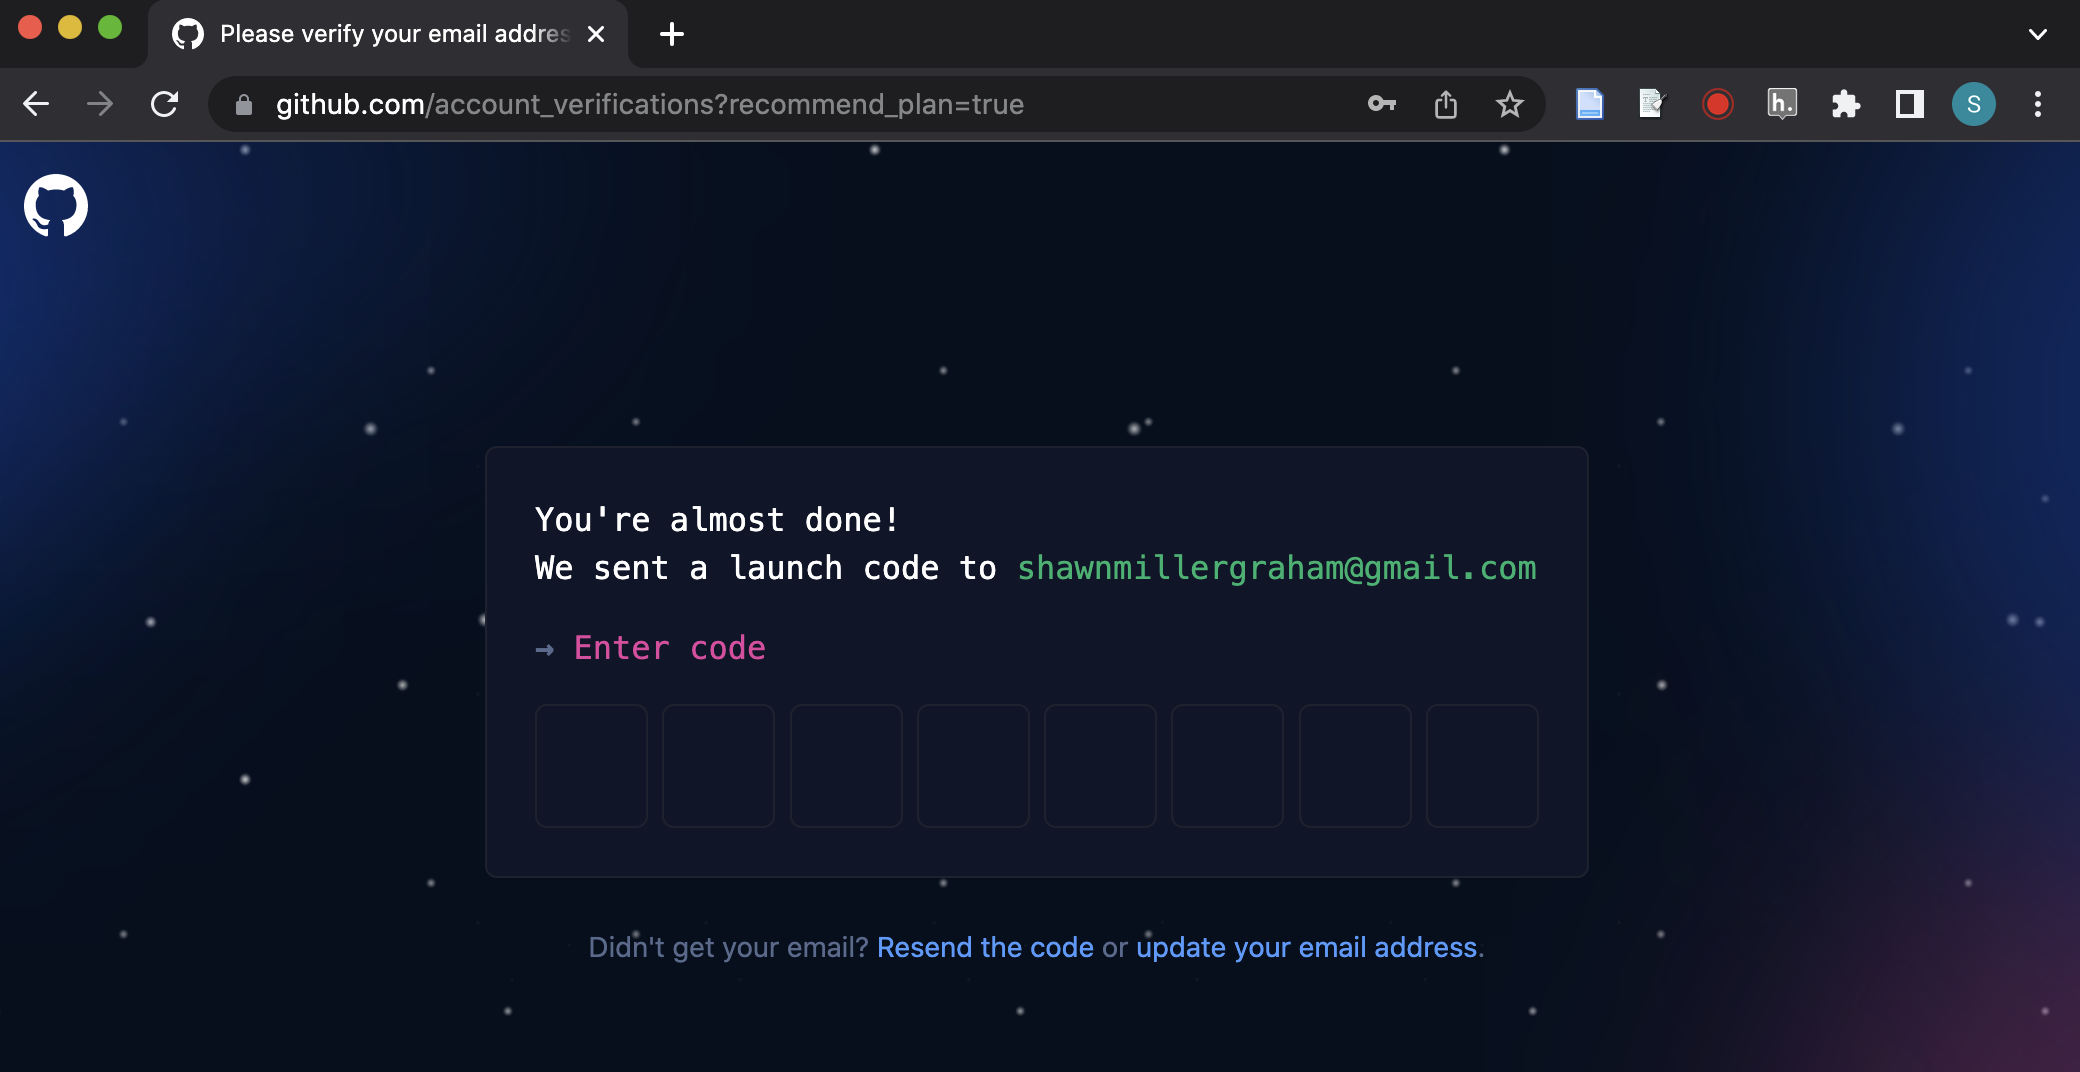
- If you entered your email in the previous step, your email will appear at the pink arrow button in the screen below; hit enter. If you just hit the geen button or the ‘sign up’ link in the previous step, you’ll see this image below. Enter your email, and hit enter.
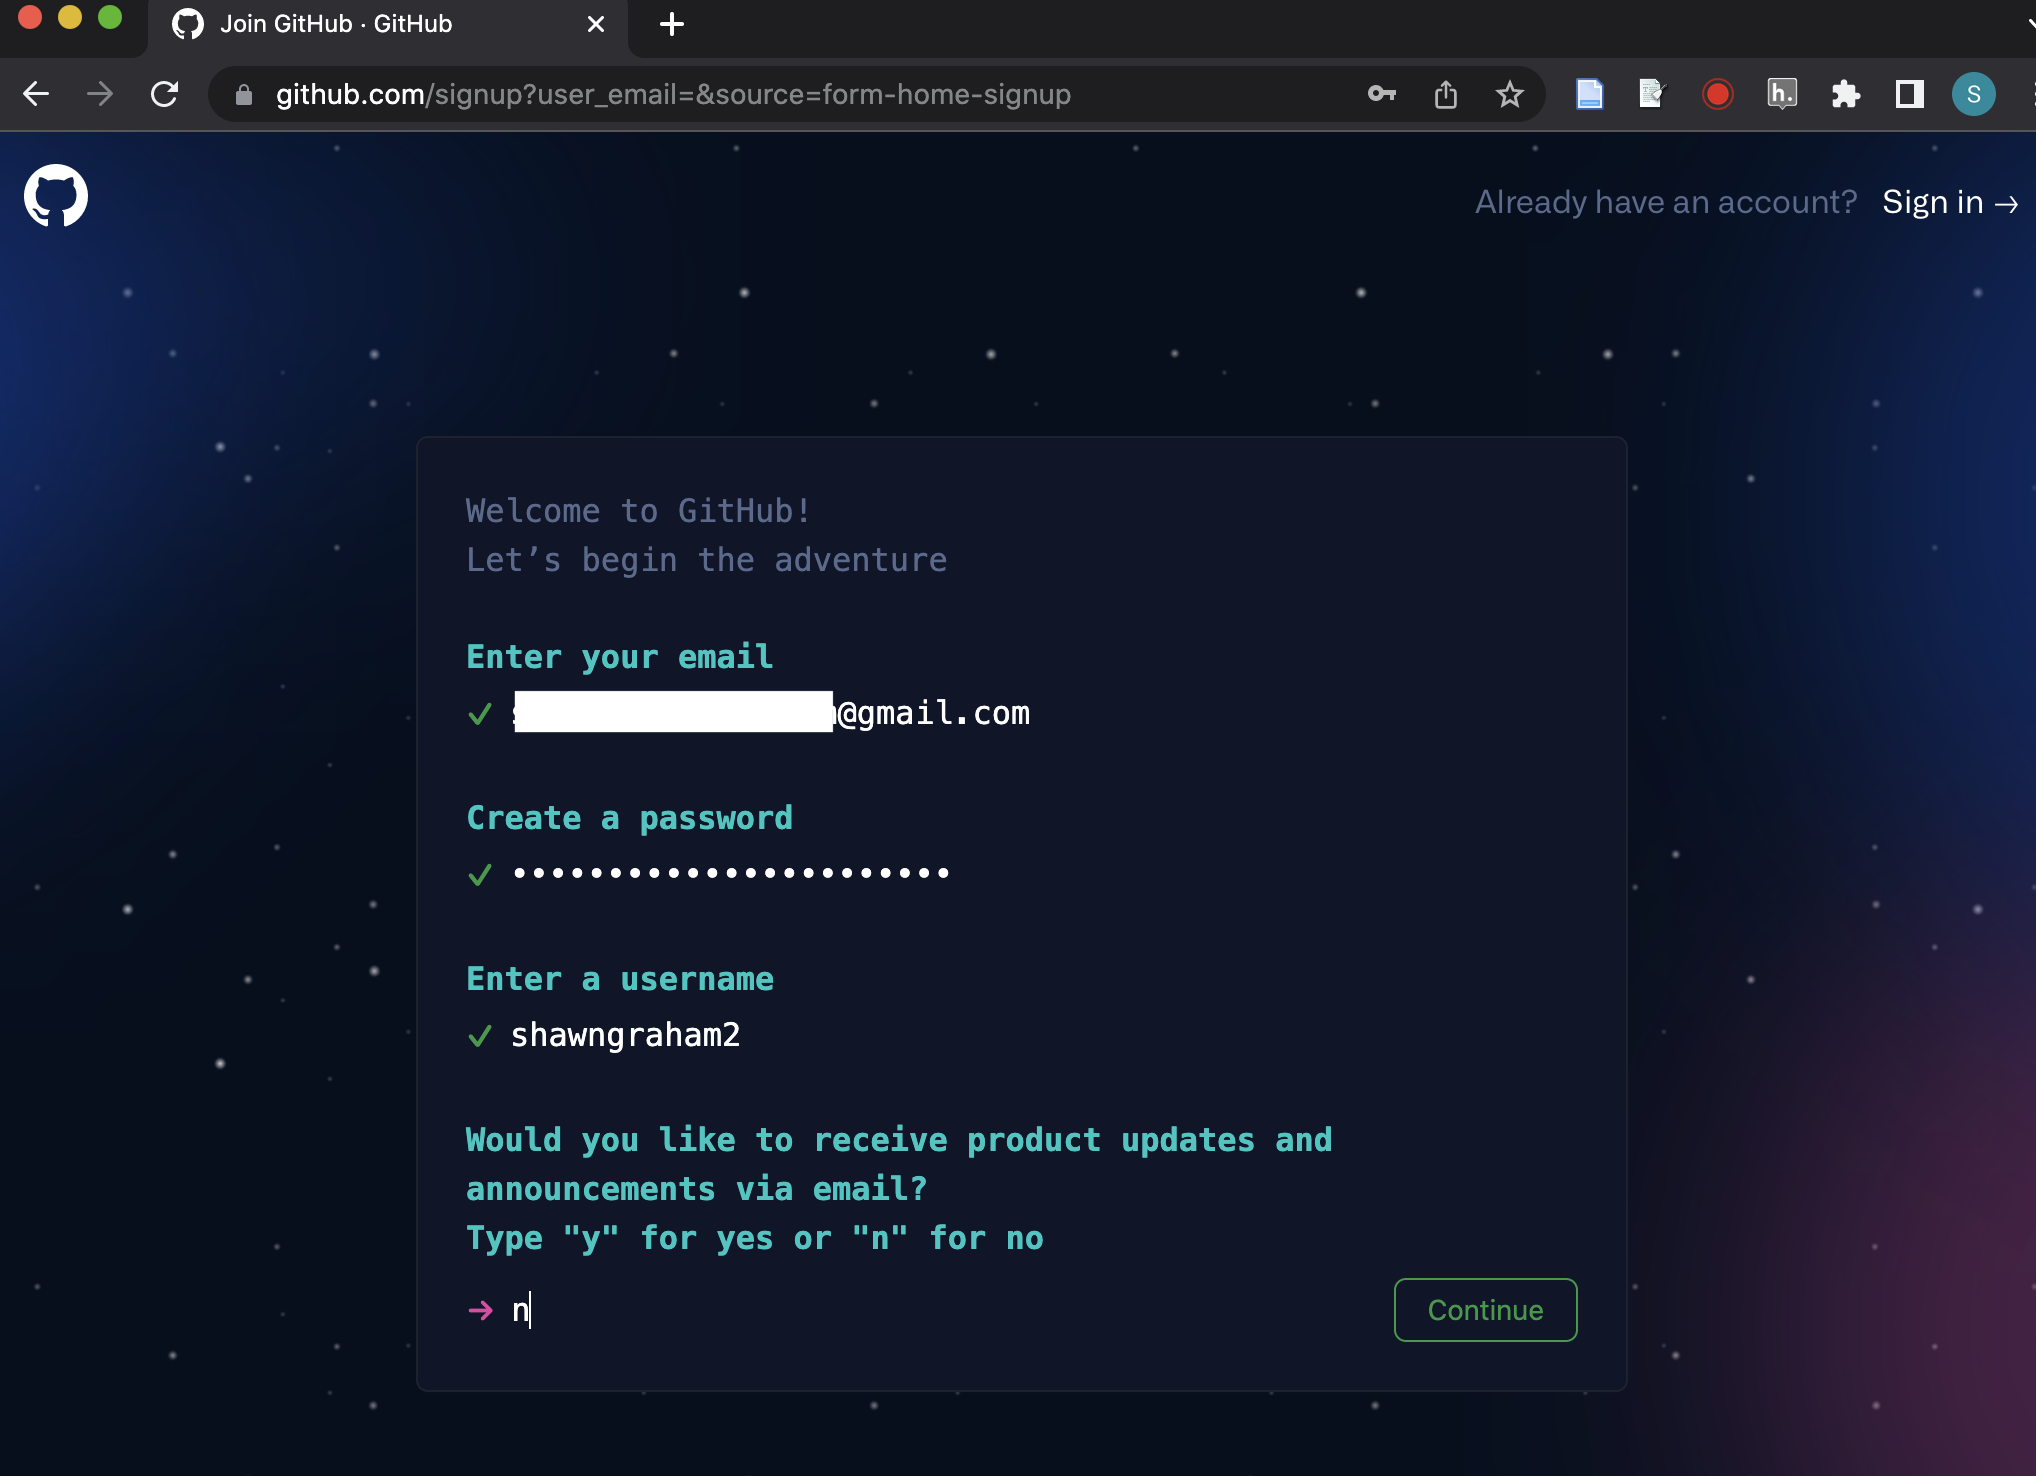
- The wizard will ask you for a password and a username and whether or not you want spam from github. Fill in as suits you. Your username doesn’t have to reflect your real name. If you use a pseudonymn, let me know in an email to shawn dot graham at carleton dot ca what username you’re using, so that I don’t get confused.
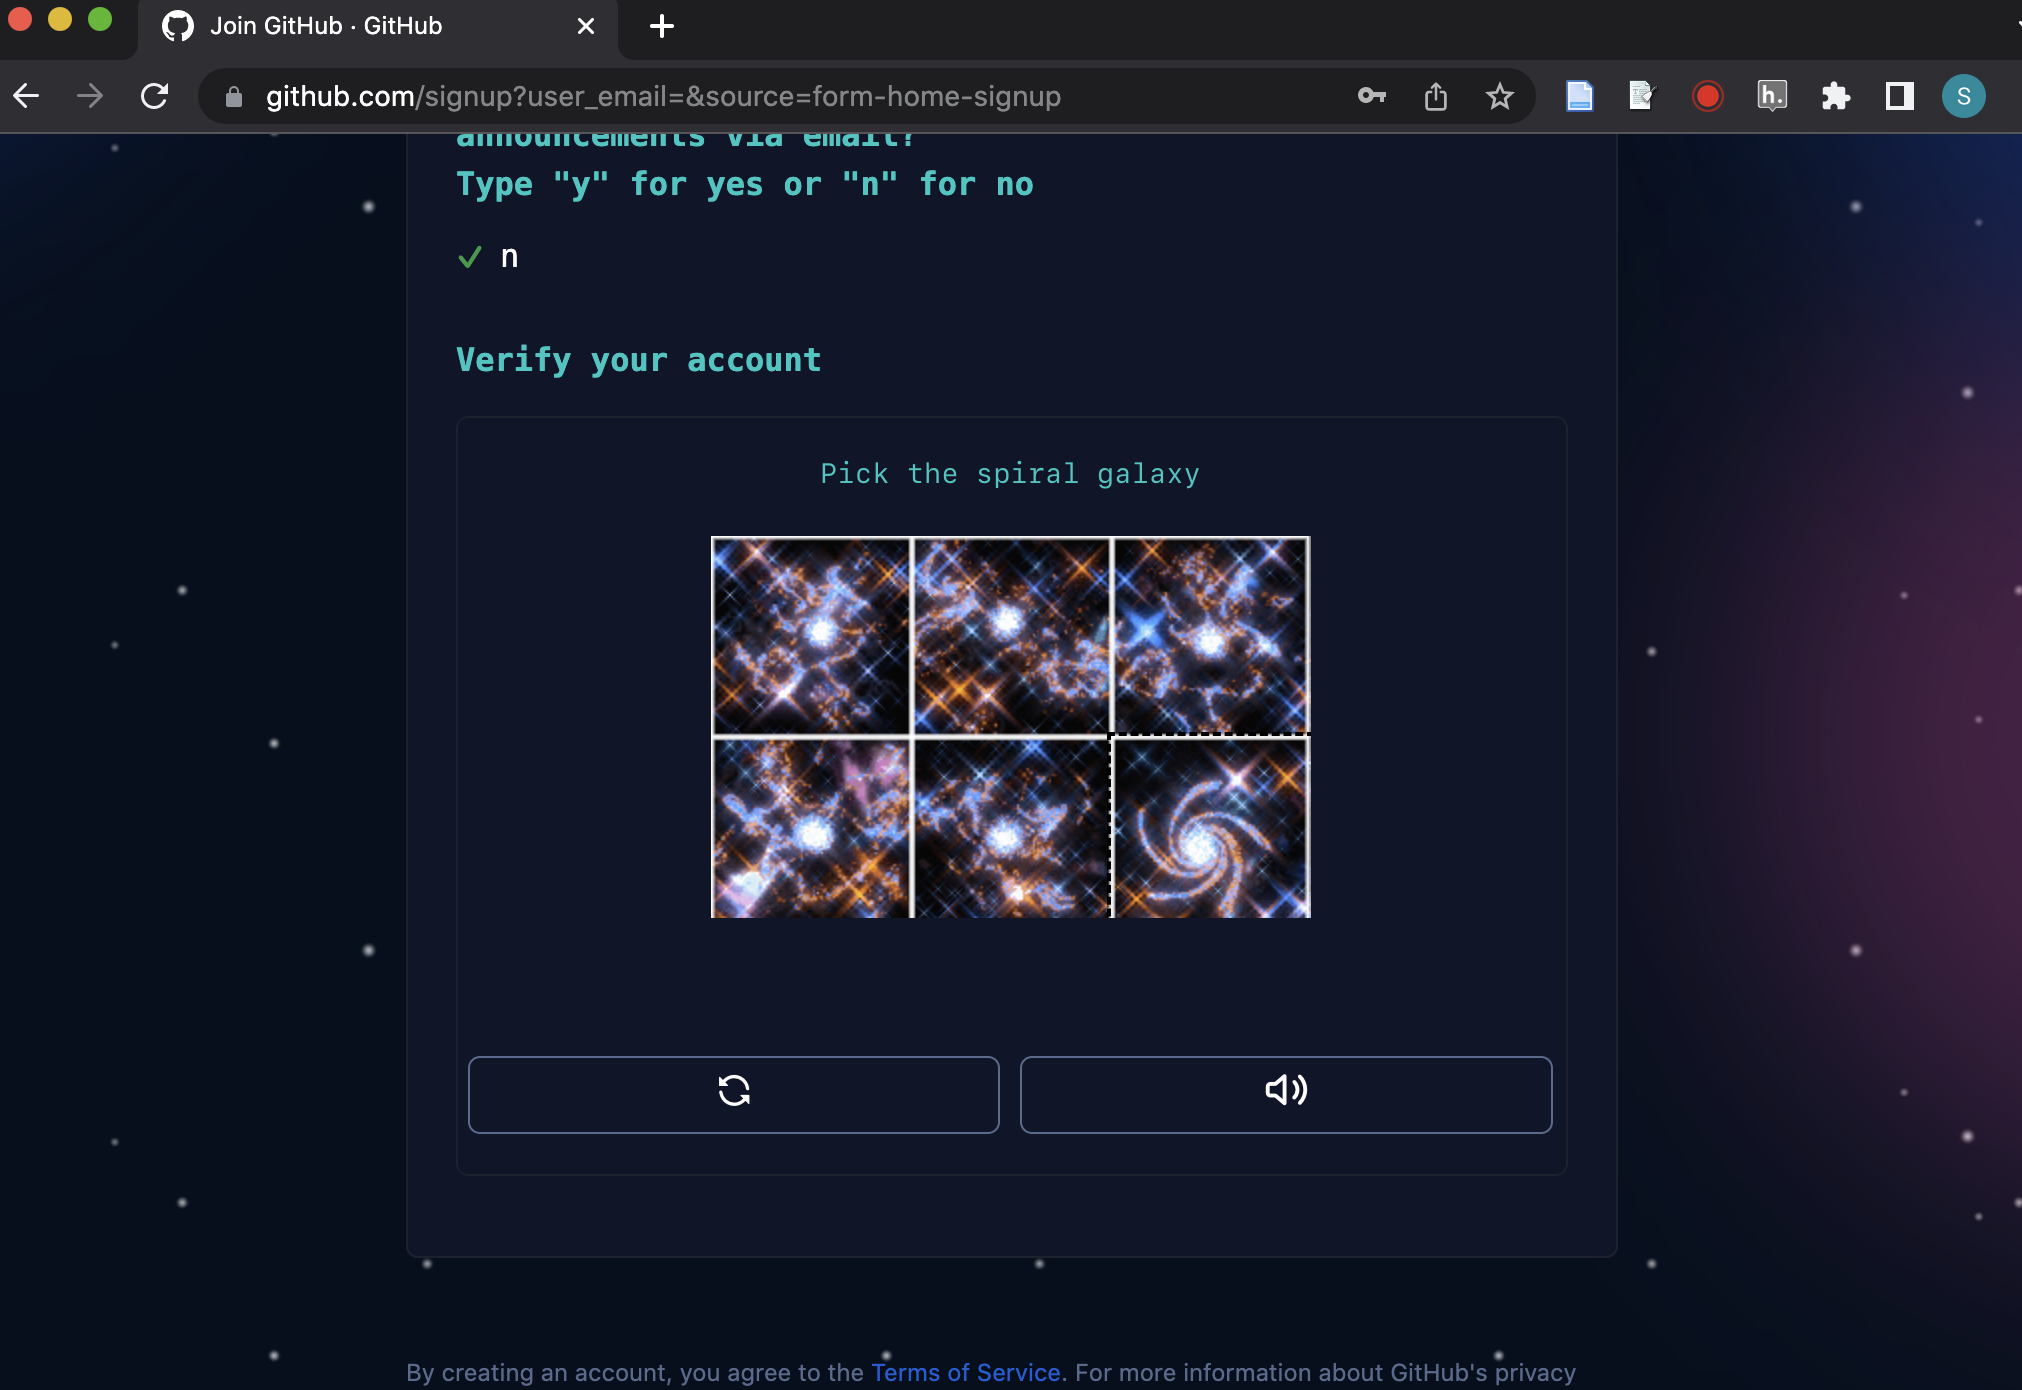
- Confirm to the github robots that you yourself are not a robot.
- Do the verification email thing. Open your email, and then enter the numbers one at a time into the boxes (you can’t copy and paste).
- Congratulations! Now you’re in!
- Your username now has a URL on the web, in this pattern:
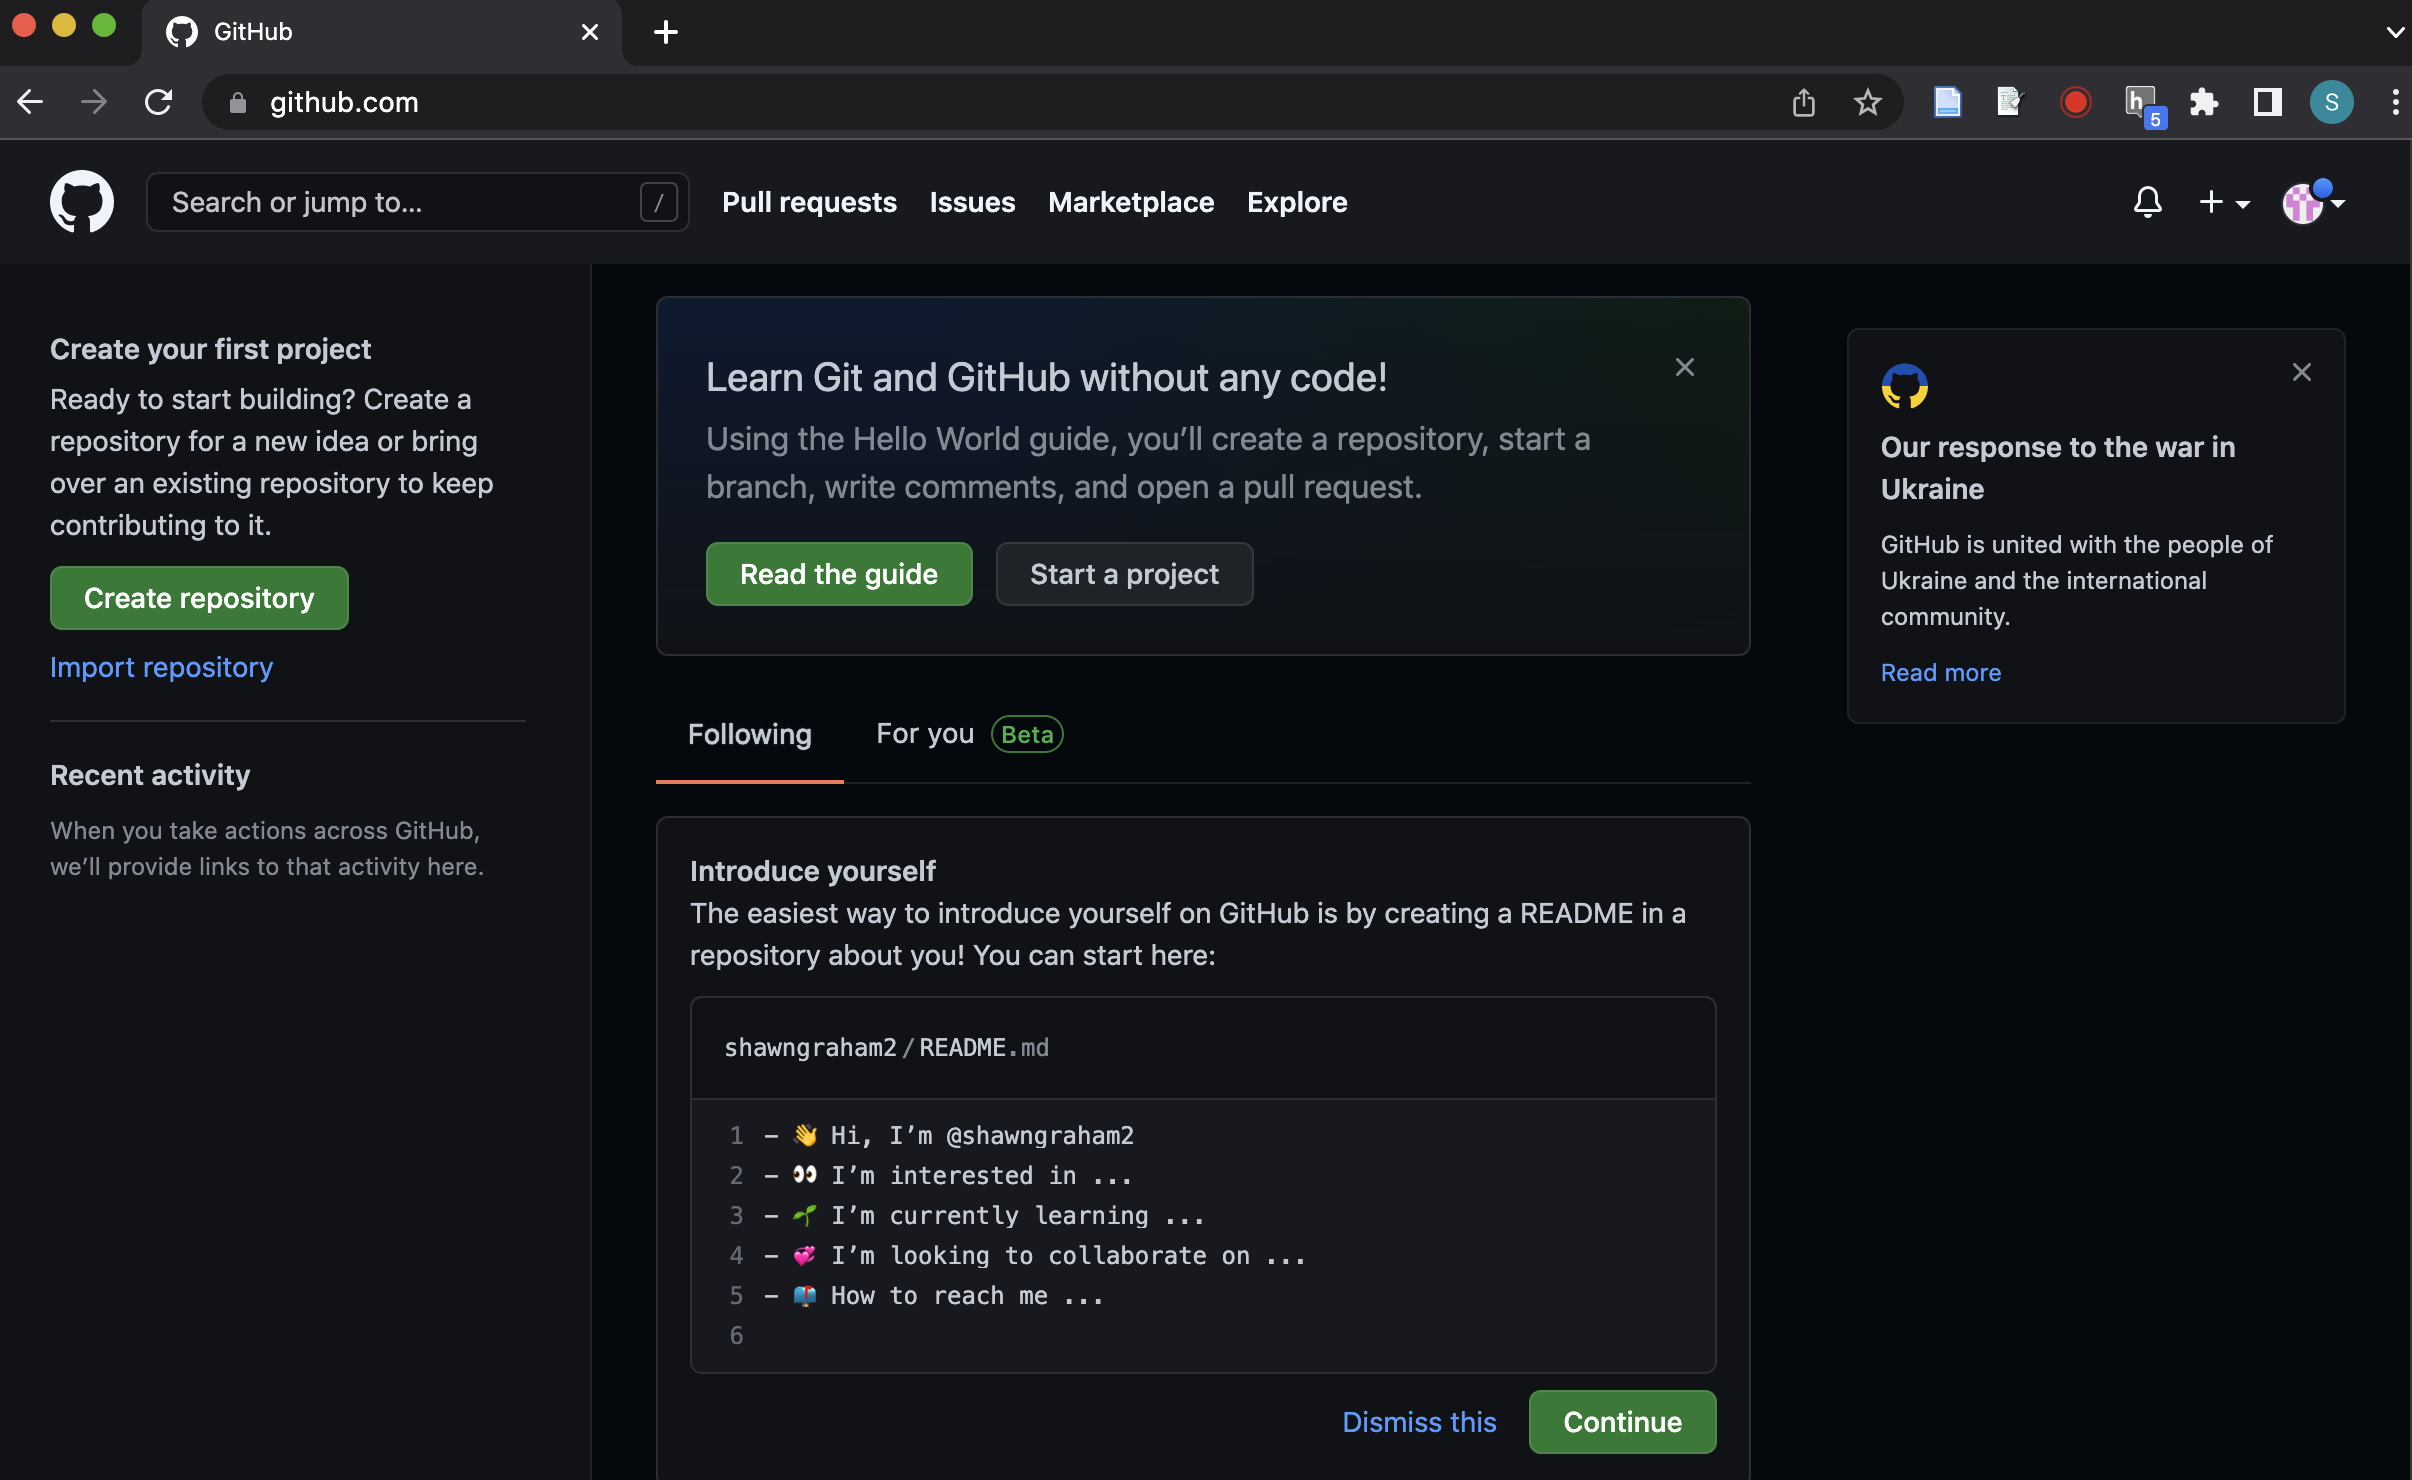
github.com/your-username. Your user page will look like this:
Make your first repo
If you are on the github.com page as depicted in step 6, click the ‘create repository’ button (or if you’ve clicked around a bit, and now github.com has a green button marked ‘new’ in the top left corner, click that). If you are on your user name page as depicted in step 7, click the + button and select ‘new repo’.
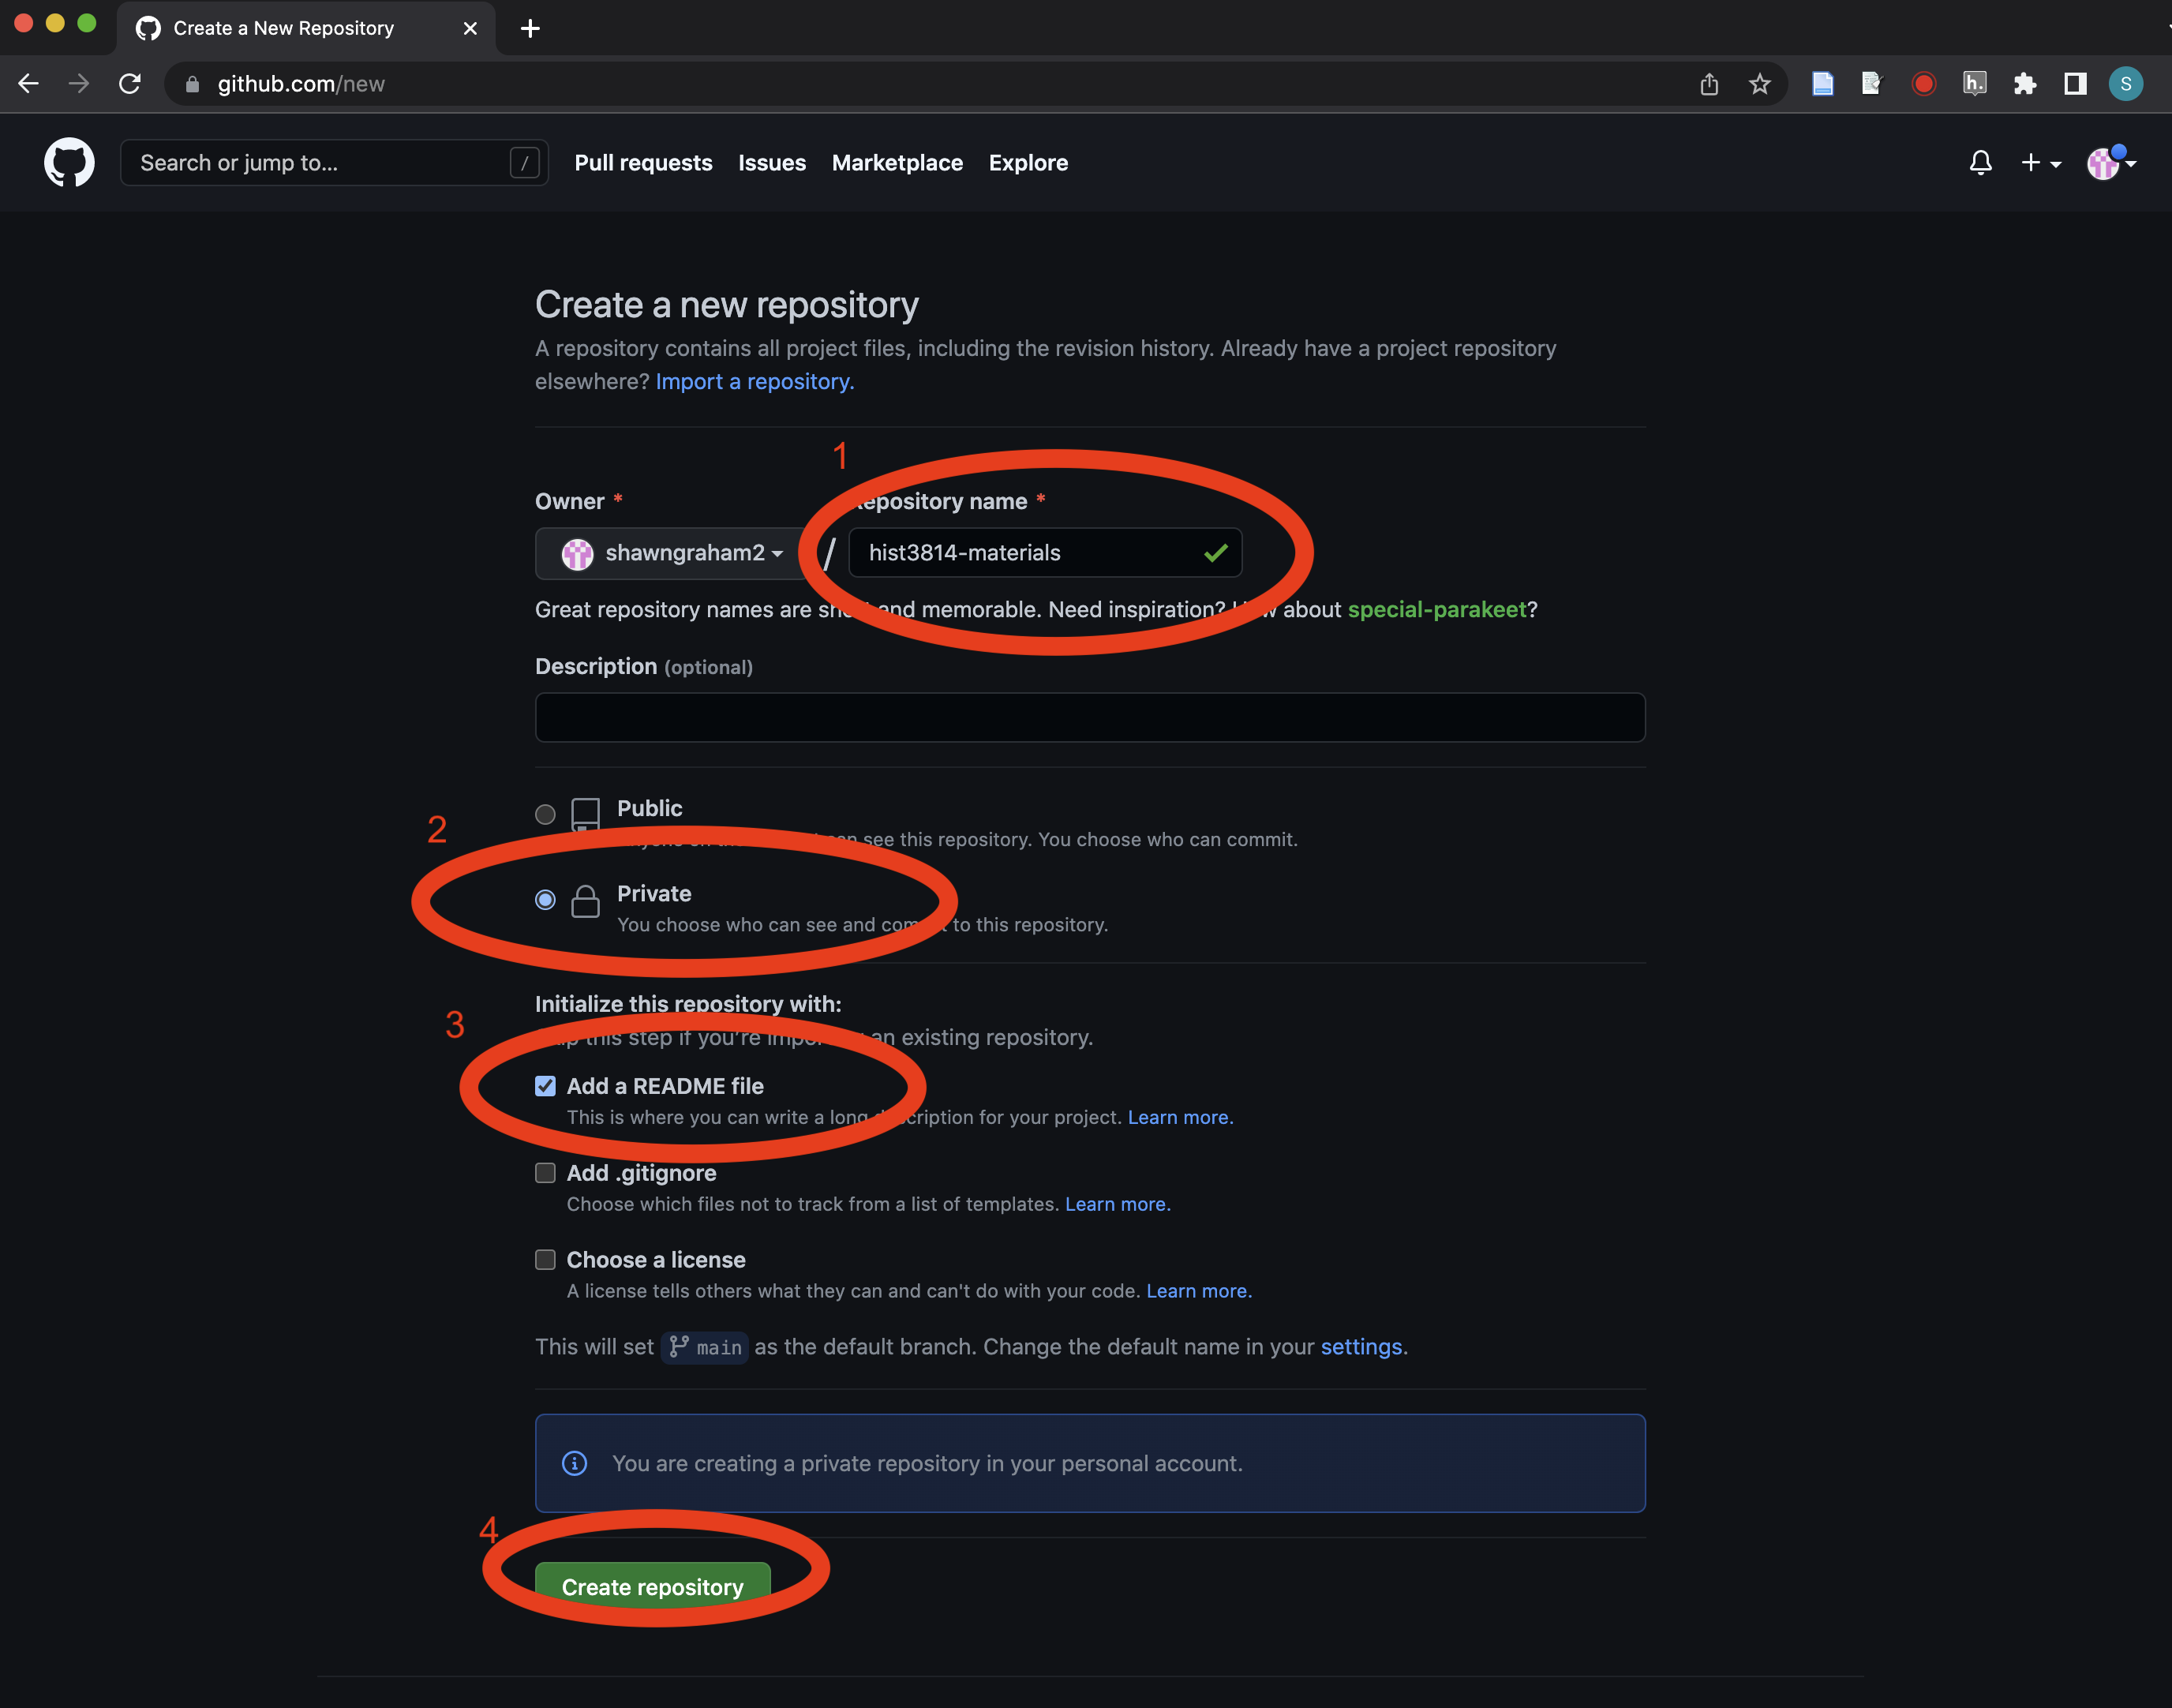
The new repo page appears; fill in the information as in the image below. Give your new repo a reasonable name; in the illustration I went with ‘hist3814-materials’; tick the ‘private’ box; tick the ‘initialize with a readme’ box, and hit the green create button:
Ta Da! You now have a github account, and you’ve created your first repository (fyi, private repos don’t appear on the overview page, but will appear on the repositories tab when you’re logged in).
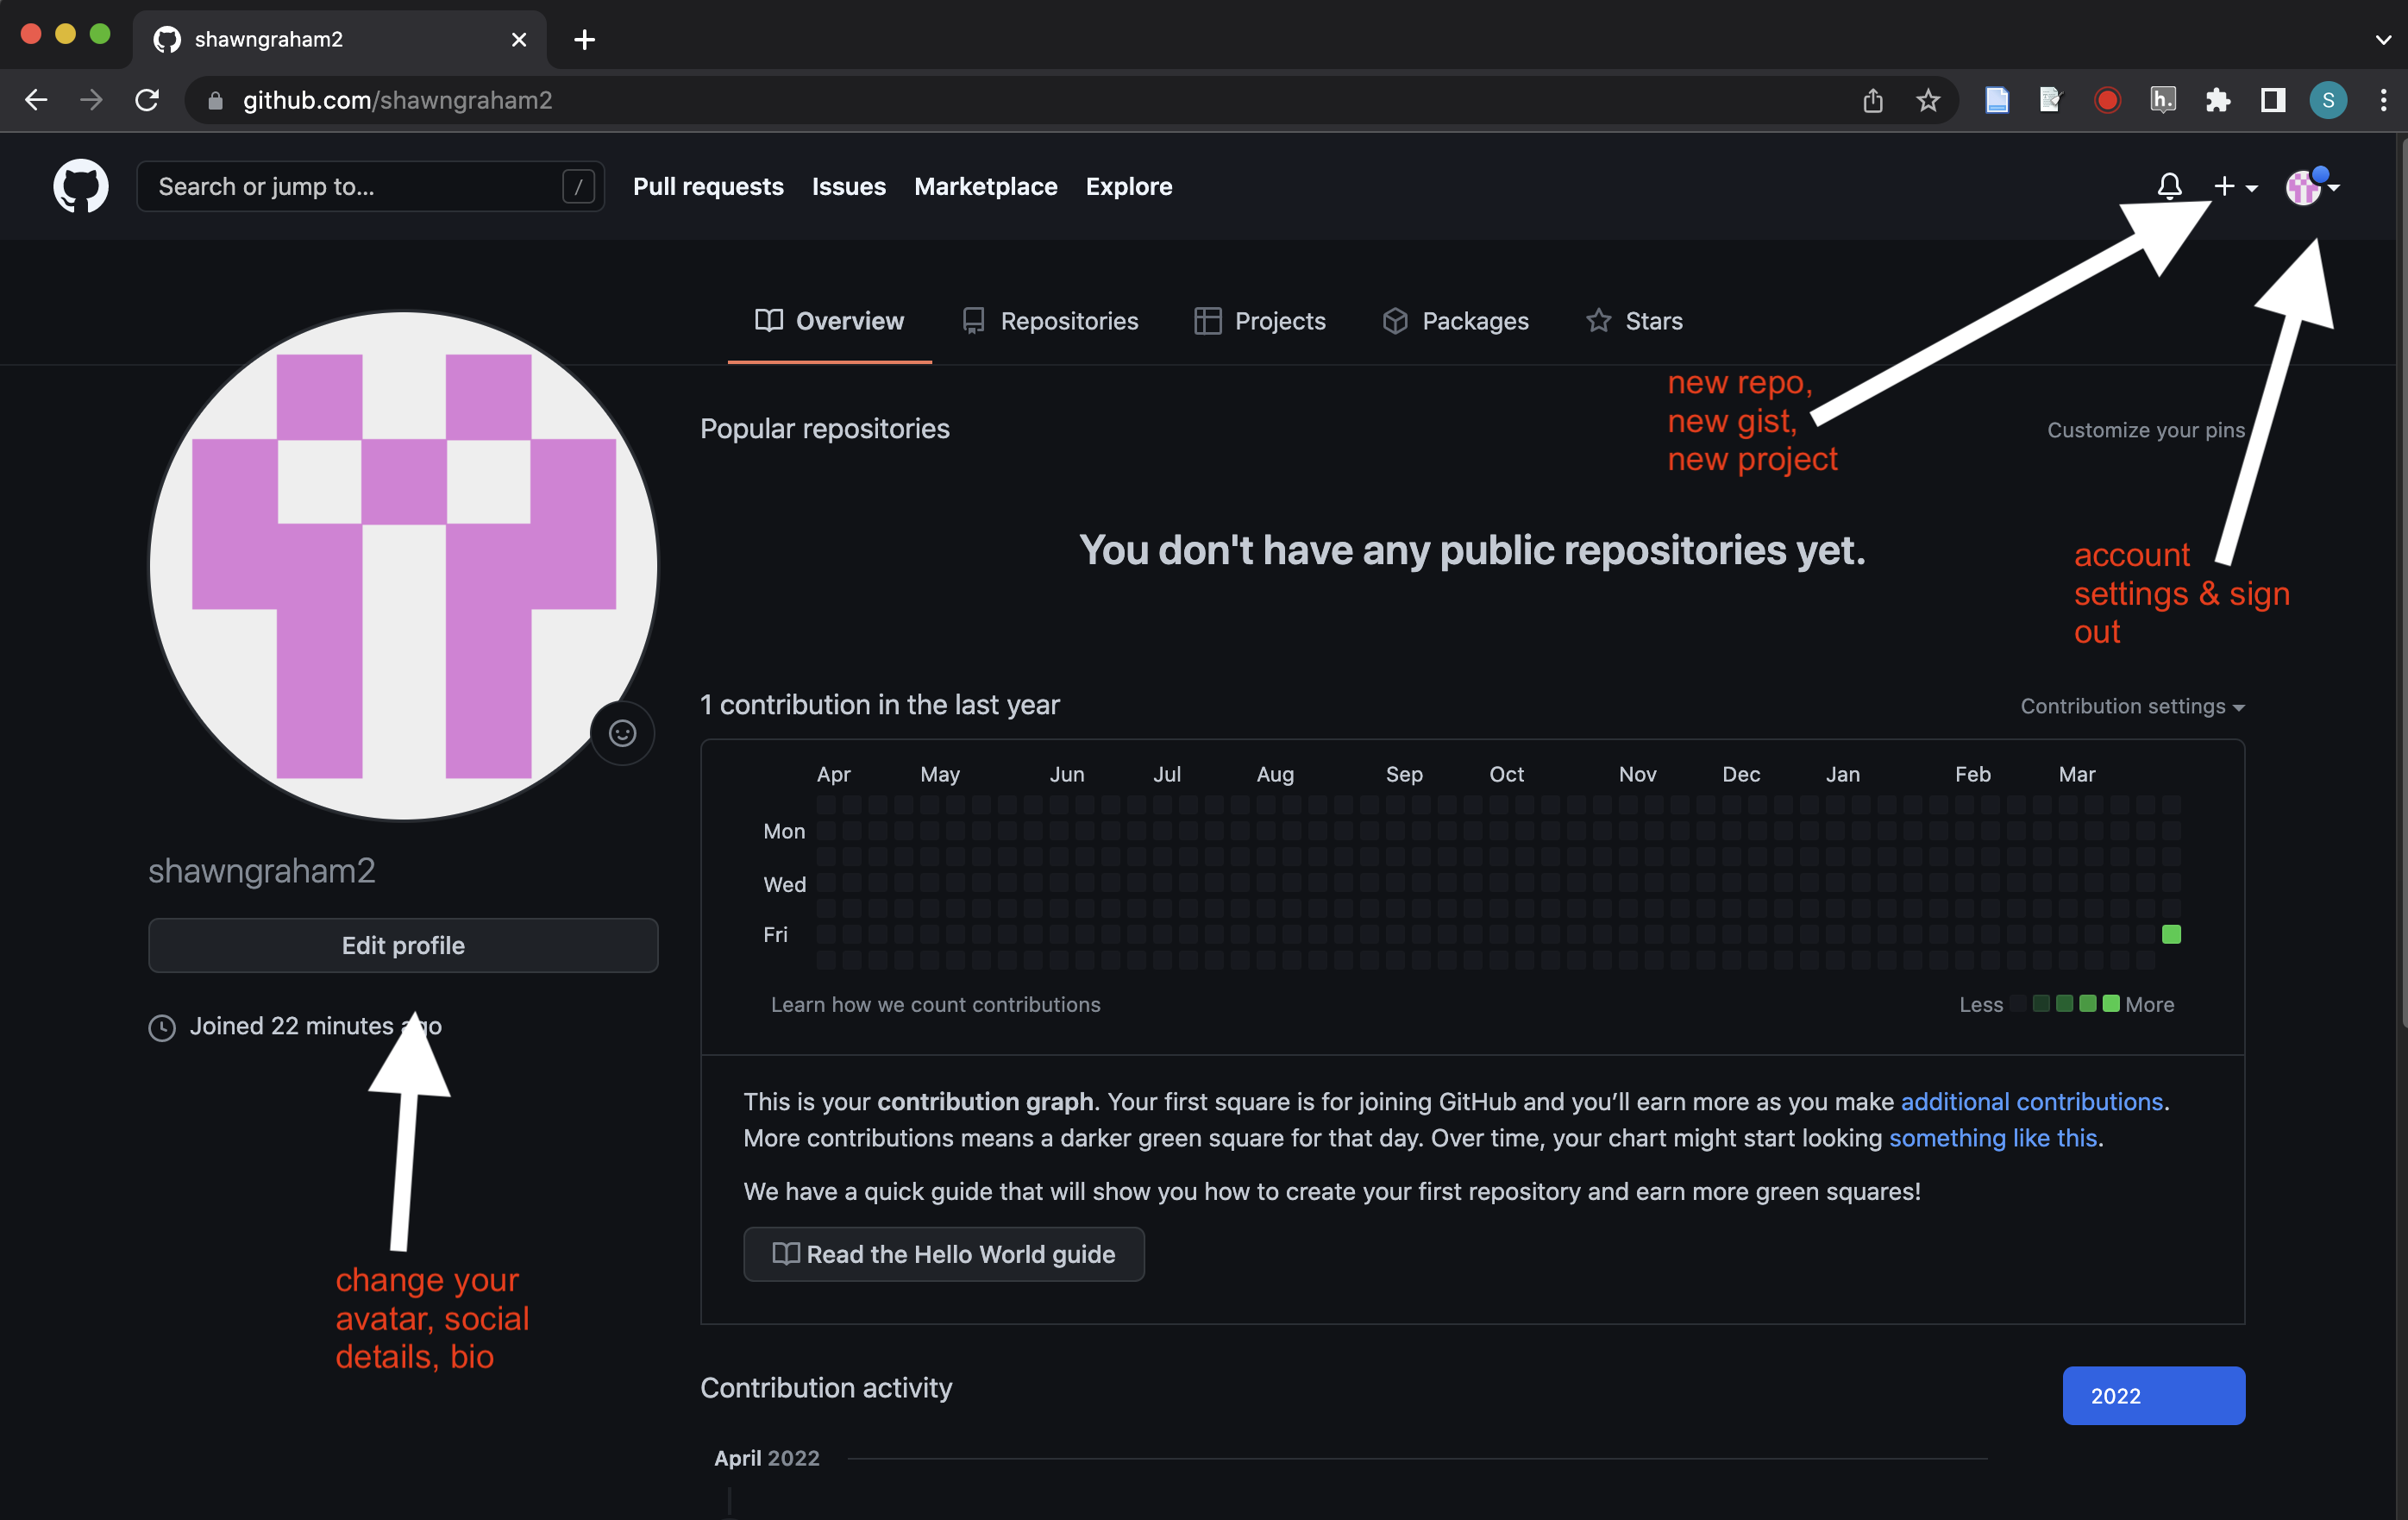
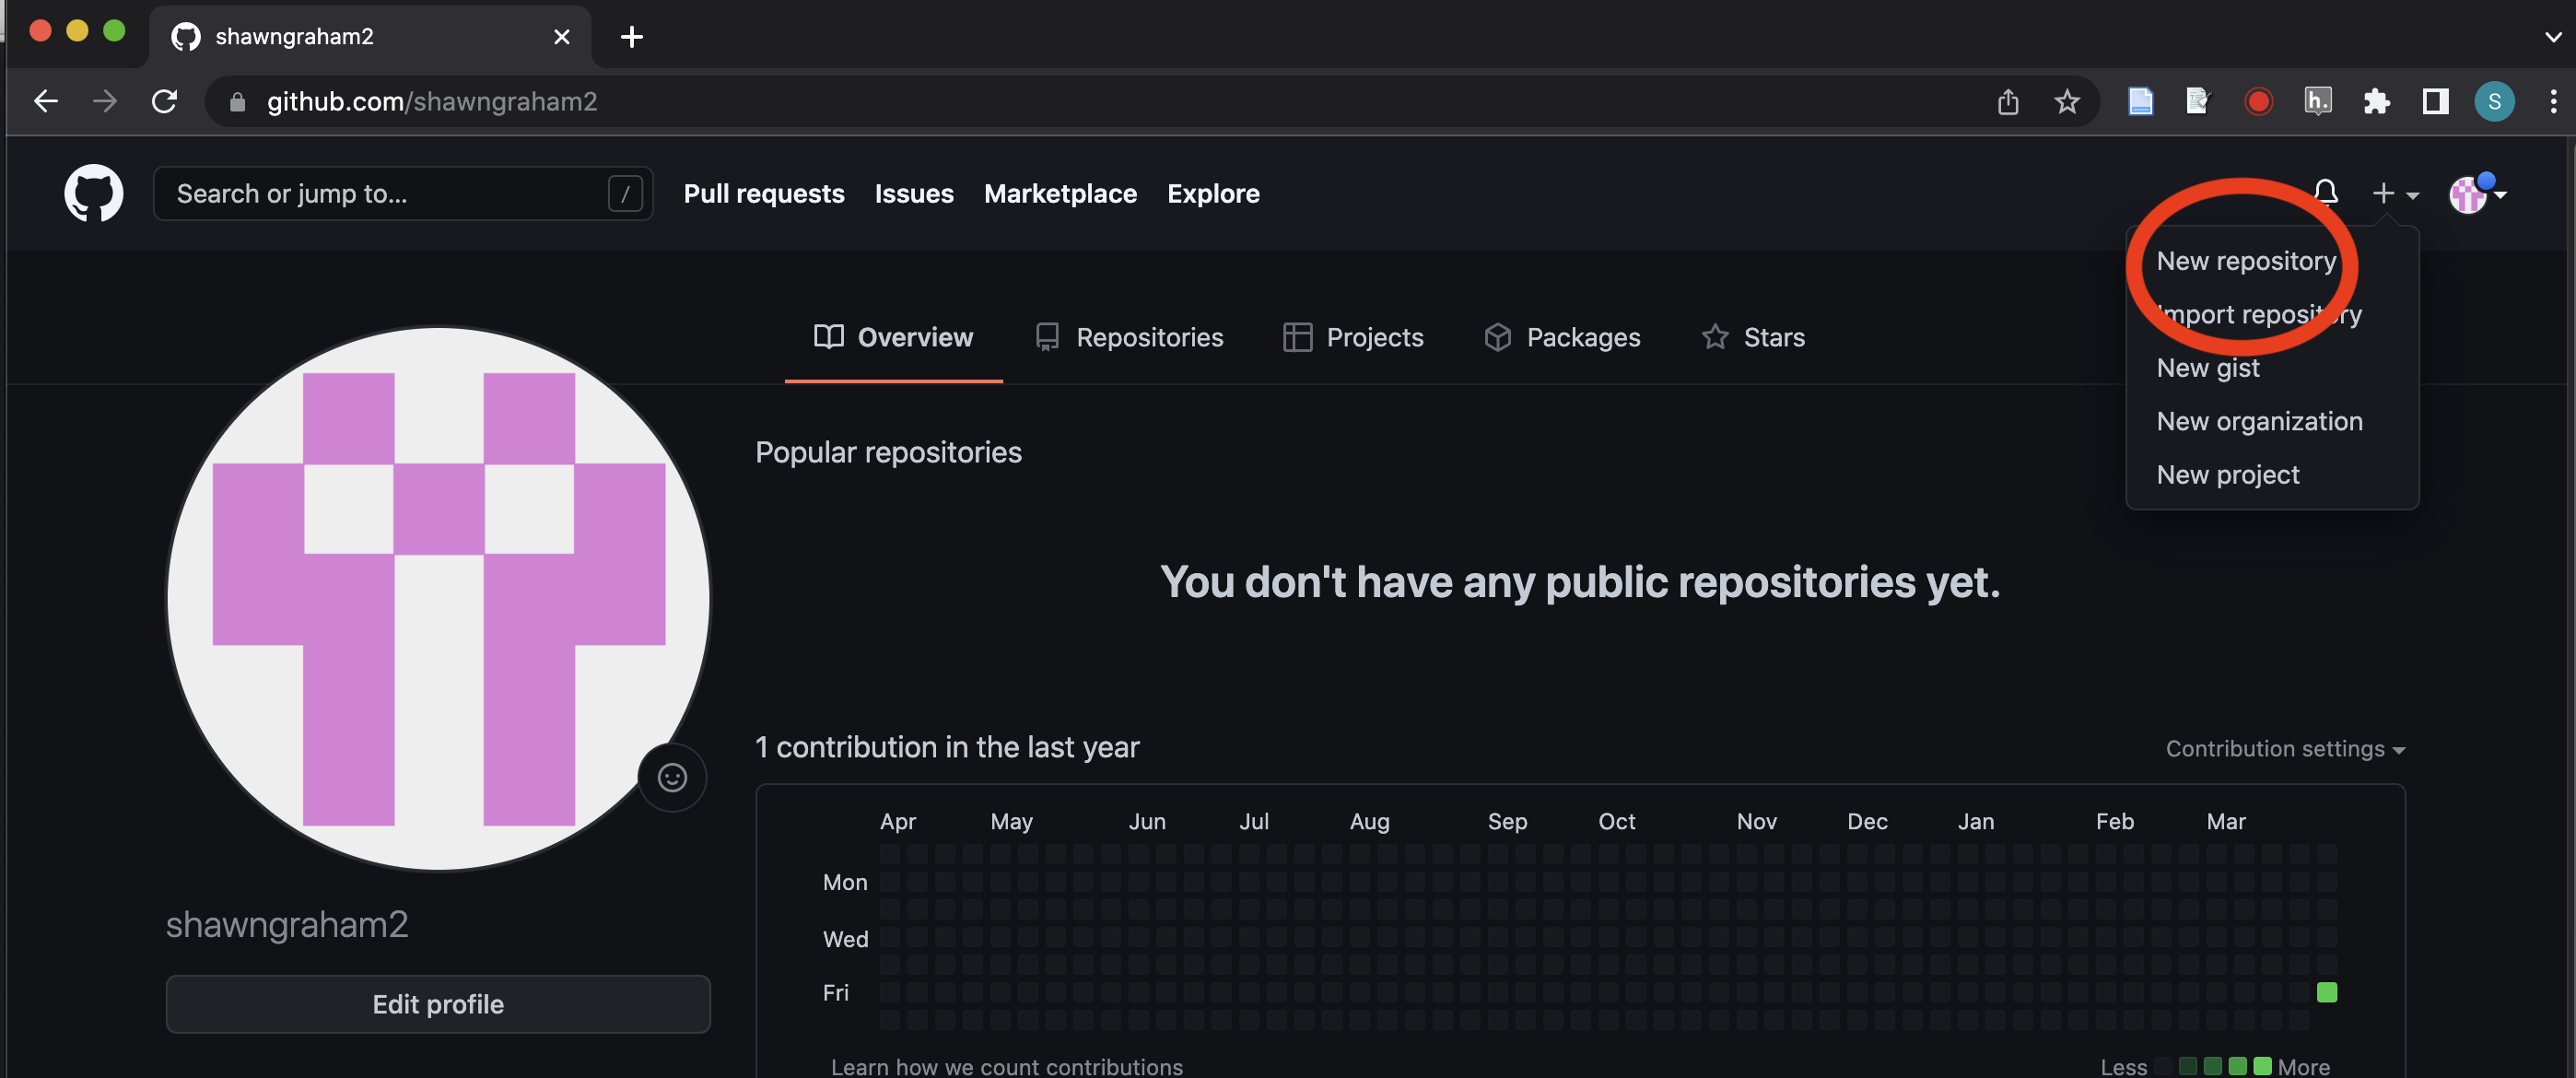
Going Forward remember that you can create a new repository from the plus sign in the top right corner:
Private Repos versus Public
A private repo can only be seen by the people to whom you give access. A public repo is visible to everyone on the internet and can be found in searches. I strongly recommend that you make any of the work you do for this class private.
- If you forgot to make a repo private, go to the repo’s settings (the cogwheel icon)

- Scroll down to the ‘danger zone’ and hit the ‘change visibility’ button.

- Github will open up a warning box, telling you that there are potentially destructive changes if you go ahead and do this. Since you have nothing in the repo right now, and no collaborators, you are ok. Go ahead and fill in the text box to complete the challenge.
Add me as a collaborator on your private repo for this course
- Add me as a collaborator to this repository by clicking on the repo settings, and then the collaborator menu:
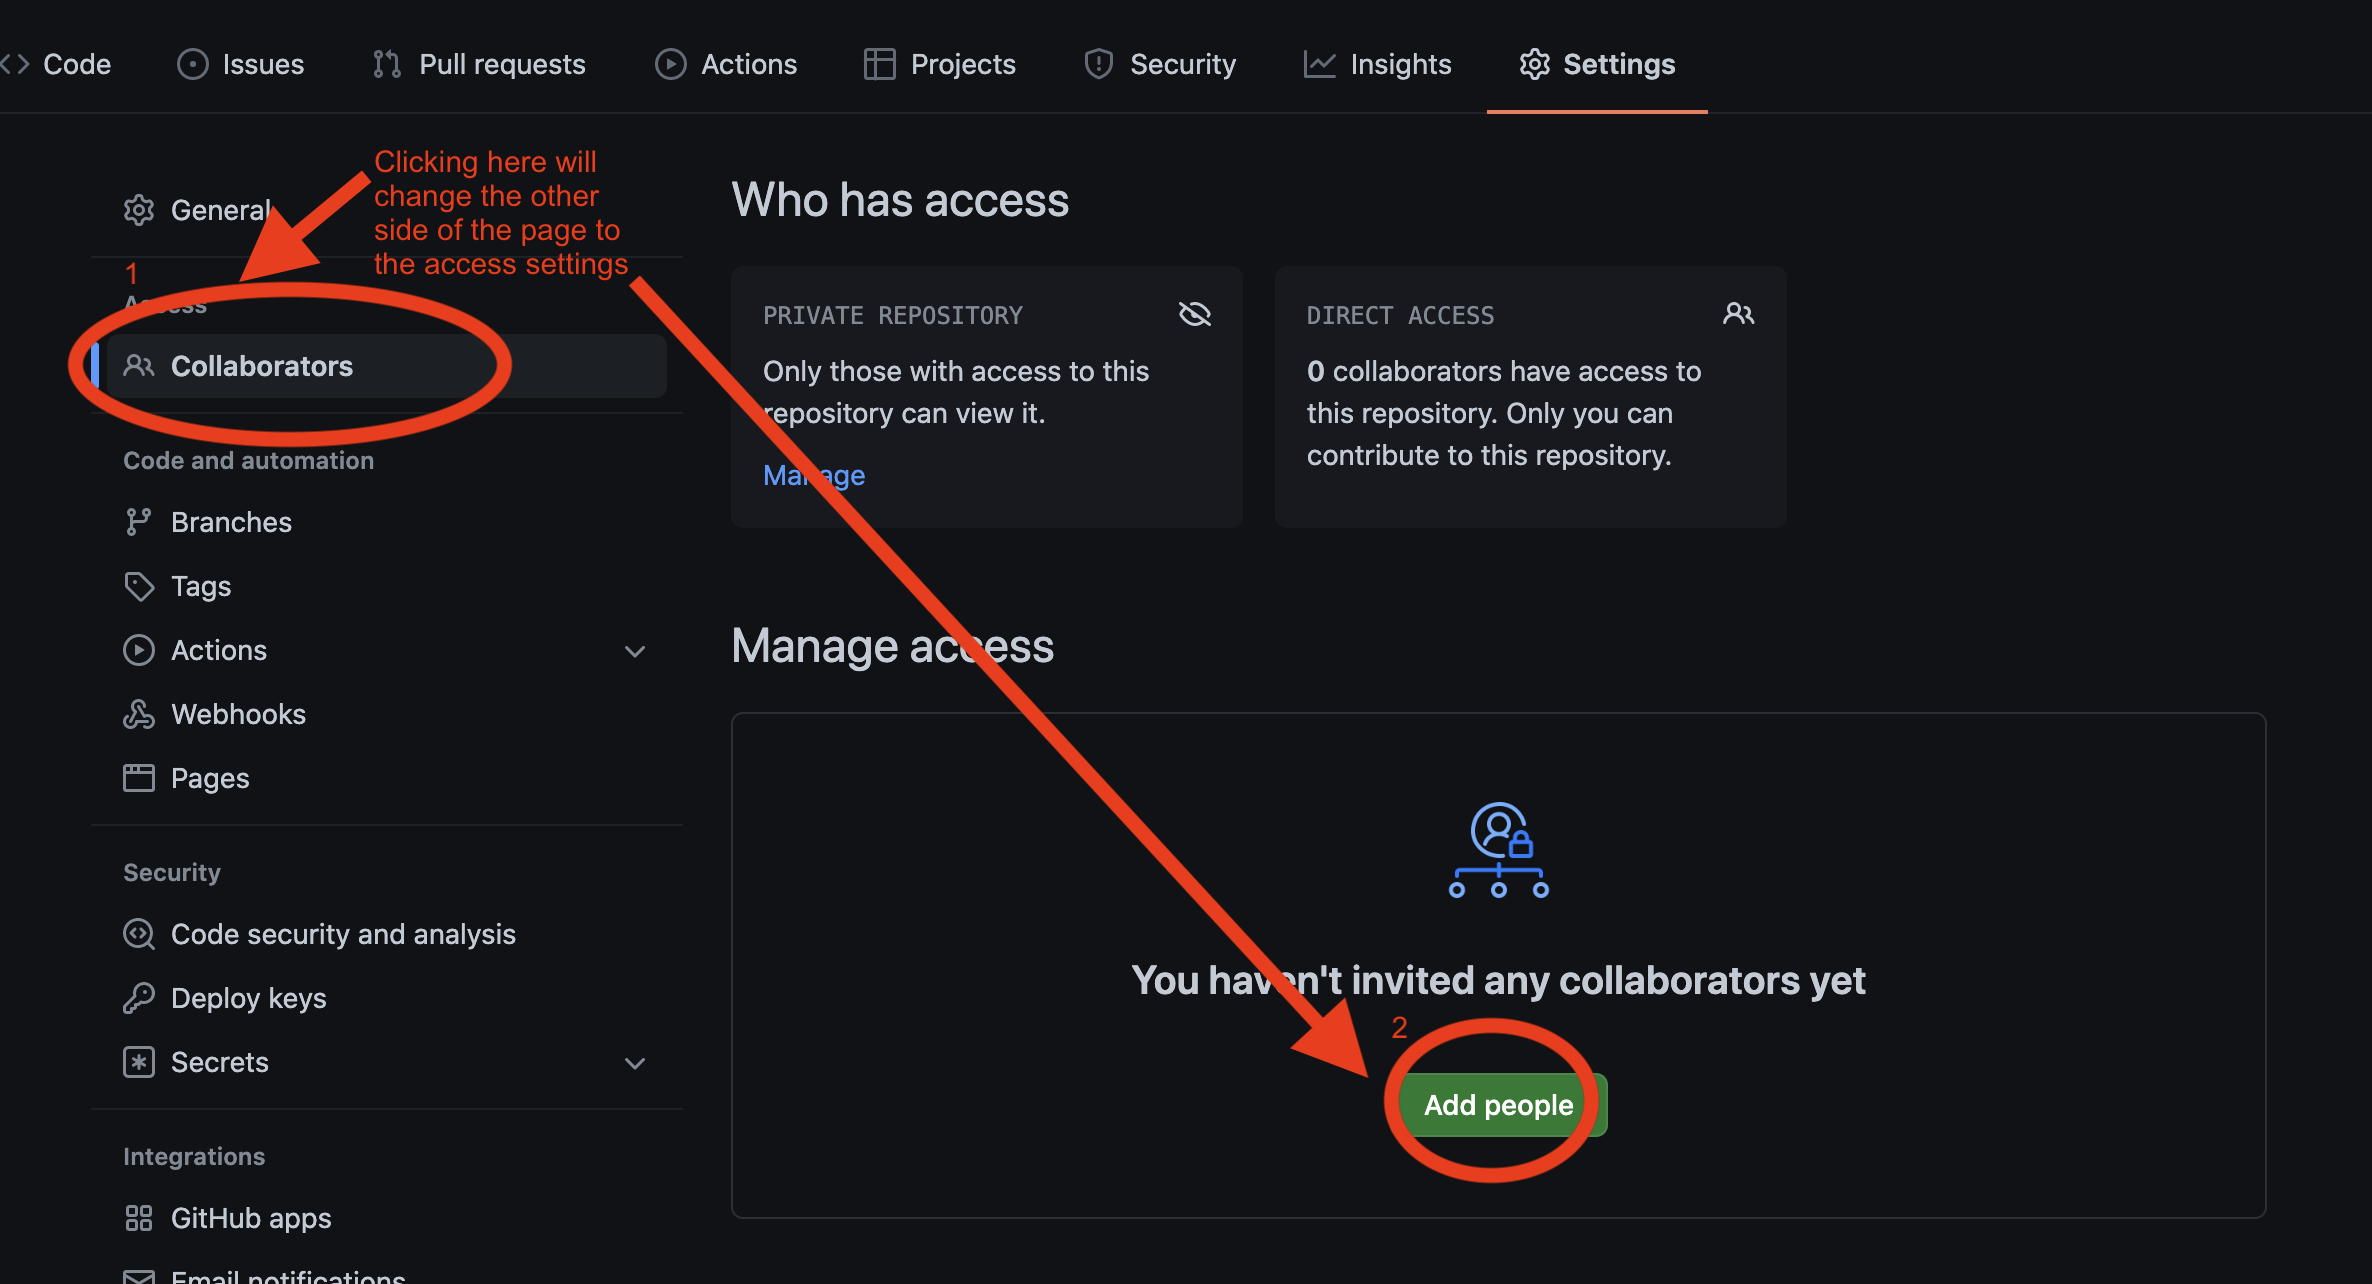
Hit the ‘Add people’ button.
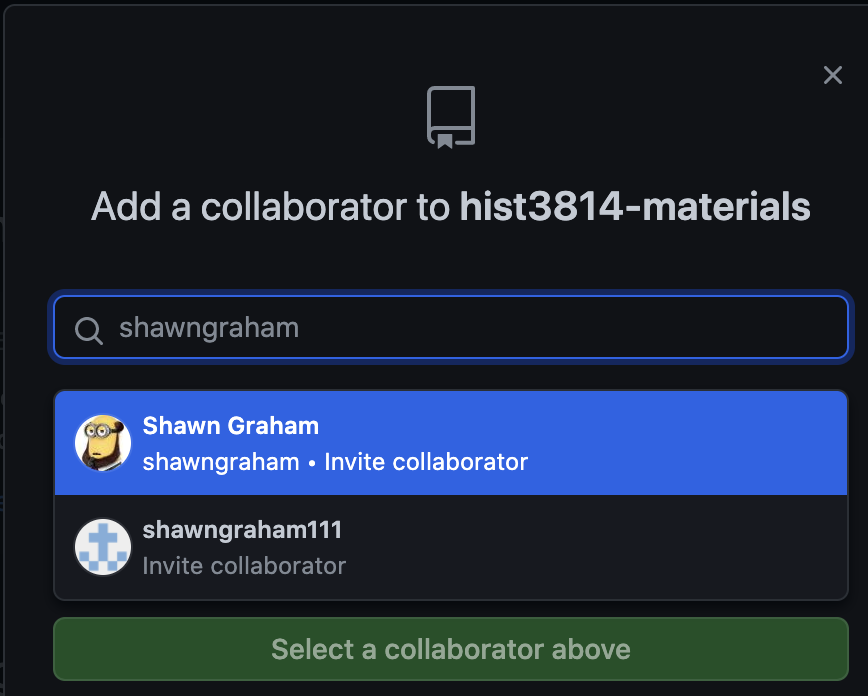
- Find my username
shawngraham- I use a minion with a beard as my avatar, and add me:
This sends me a notification. I will accept the invitation. Once I’ve done that, my username will appear on your repository settings under ‘collaborators’.
Making a new text file (and/or a folder) on Github
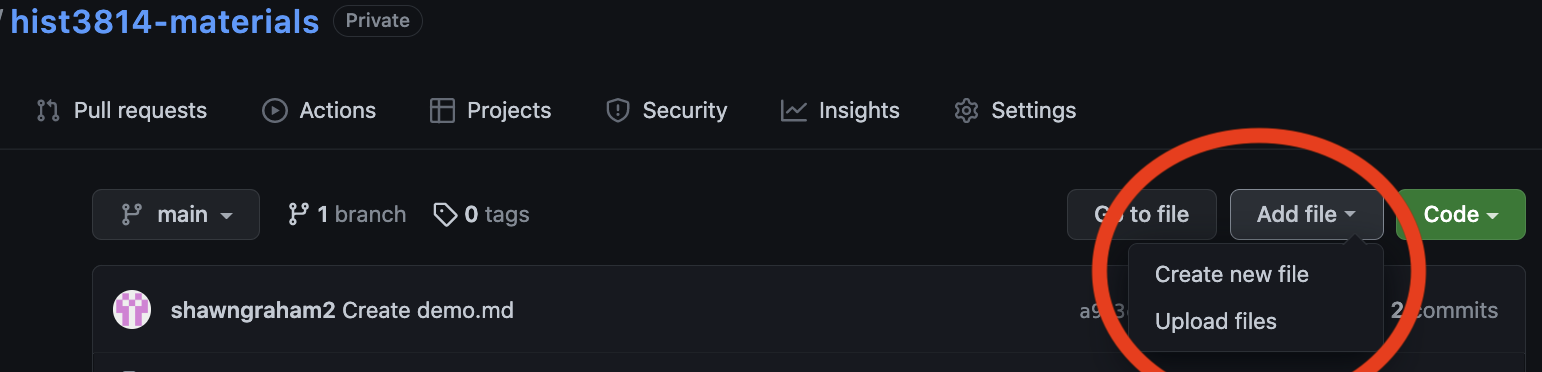
You can make a new text file by clicking on the ‘add file’ button and then the ‘create new file’ option; The new file screen will open and the cursor will be blinking in the box where you write the filename. When you make a new markdown text file remember to always use .md as the file extension in the name.
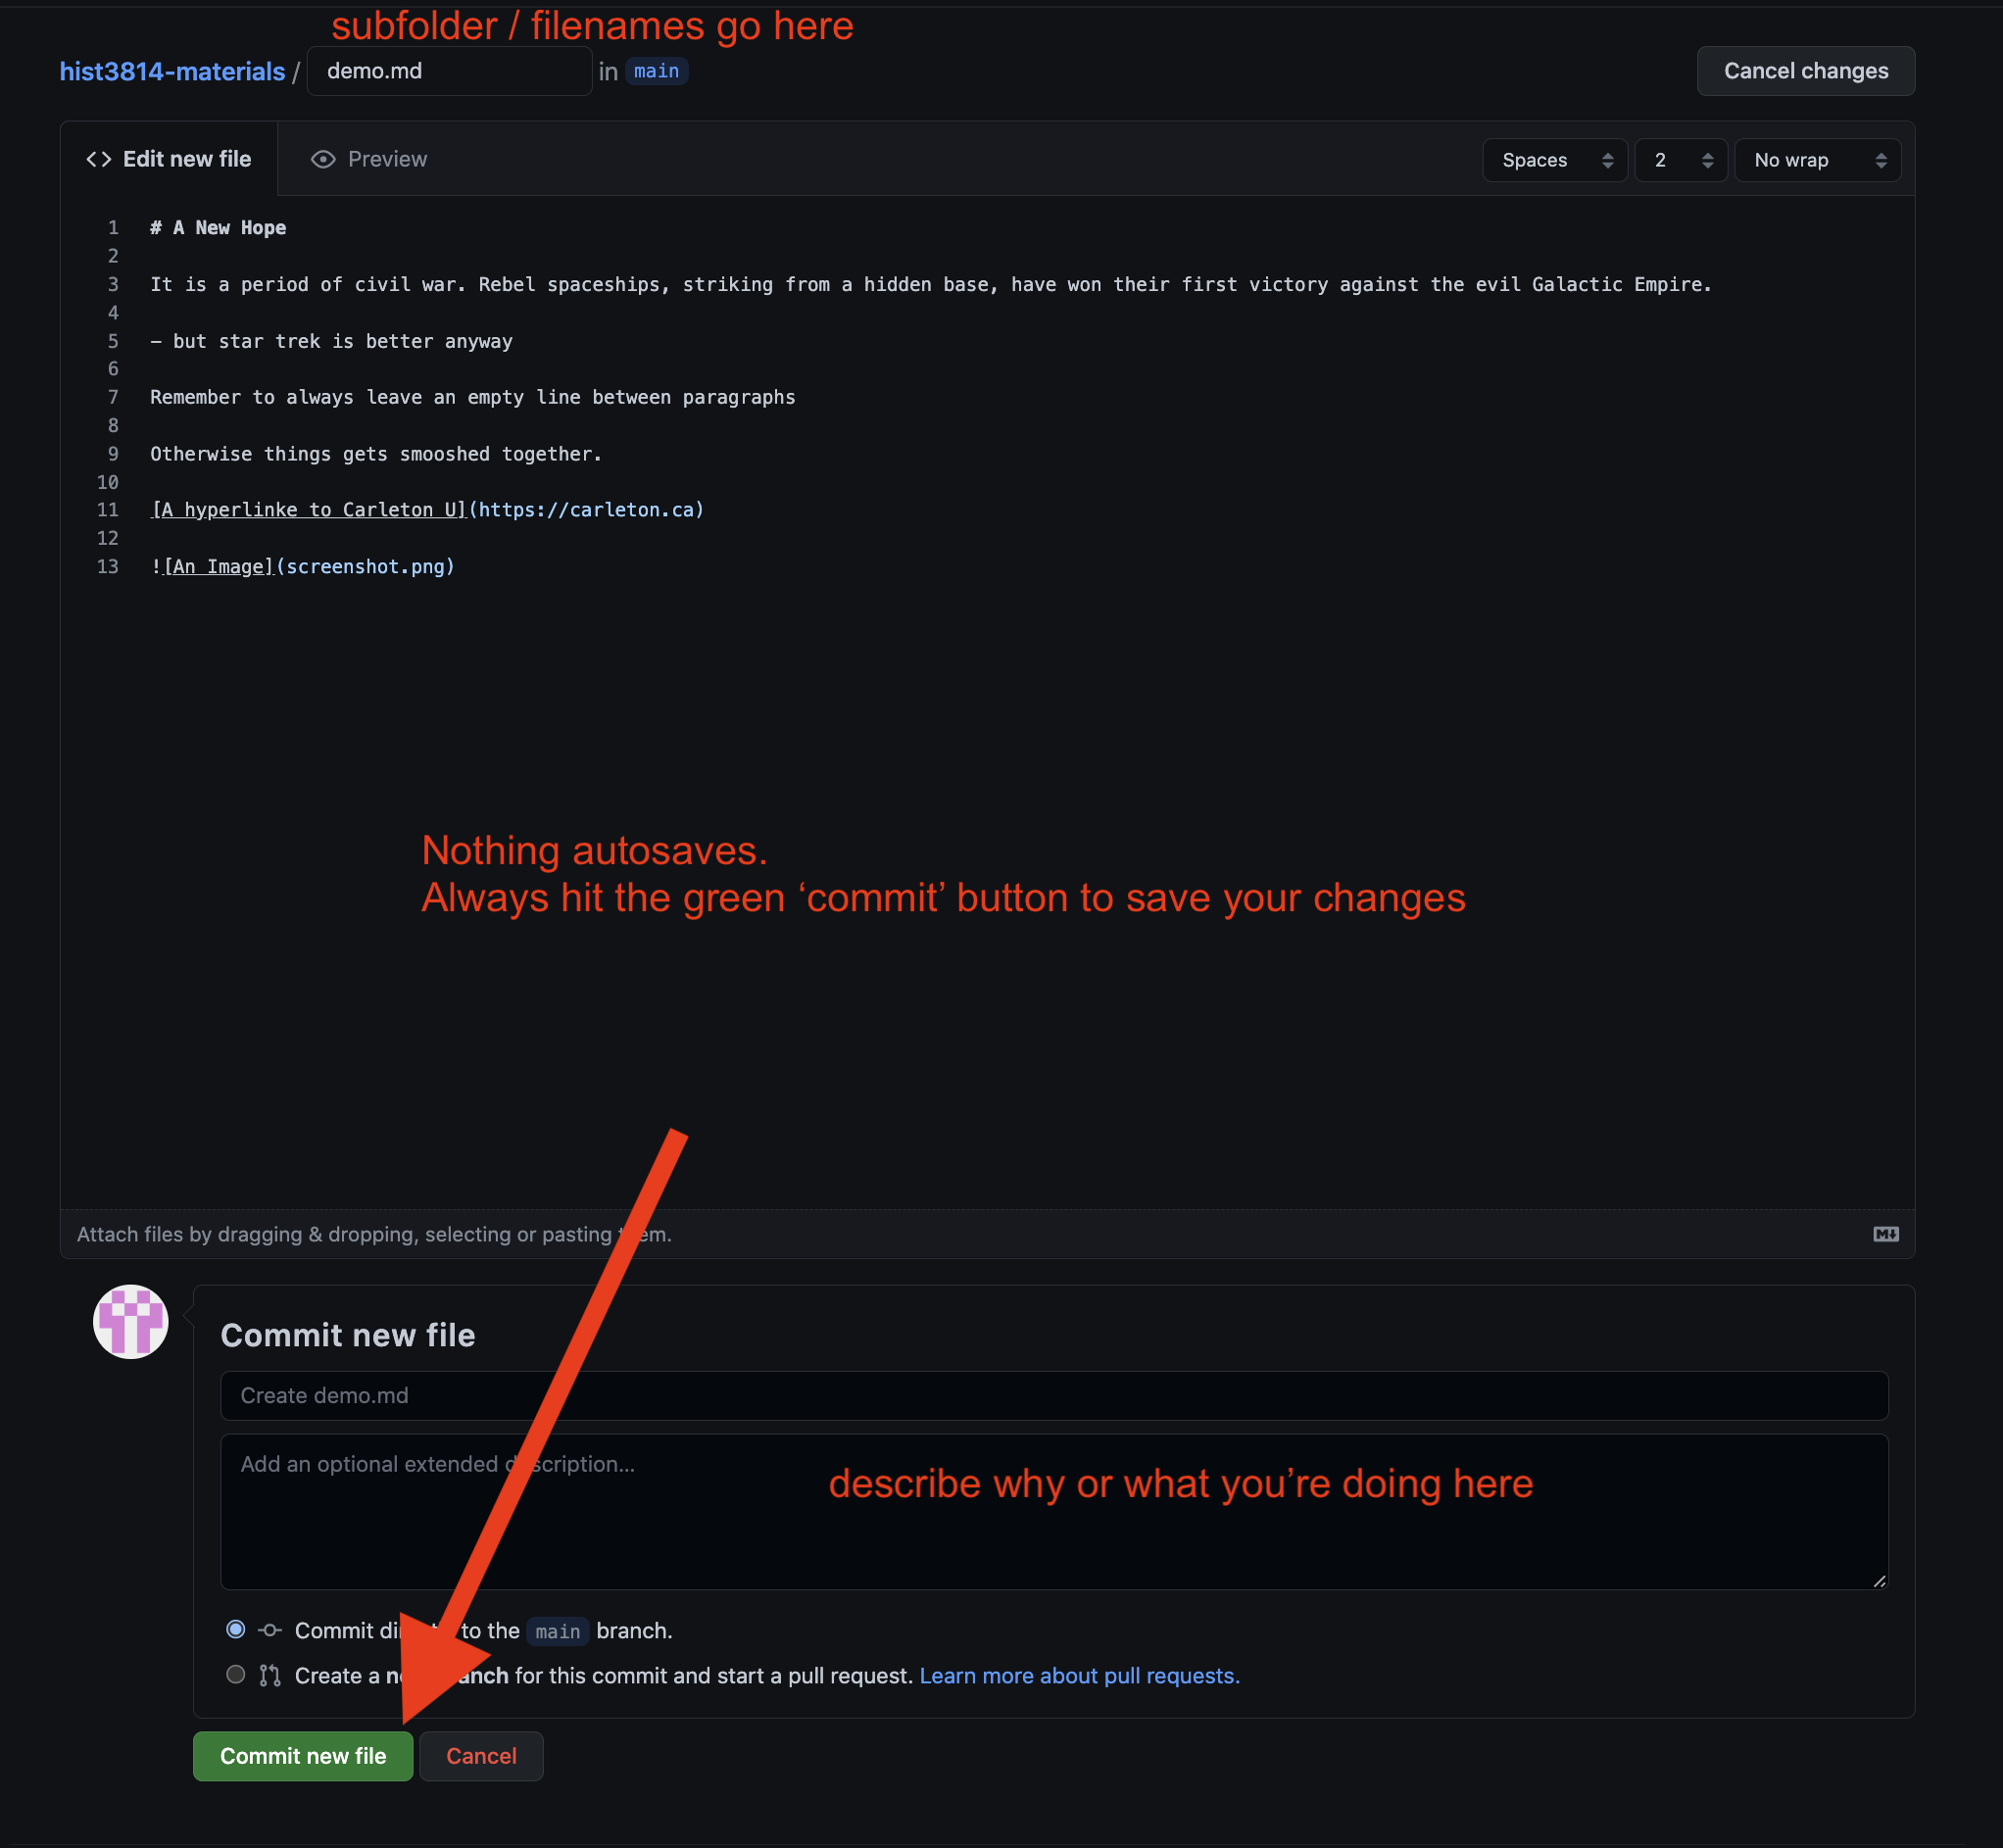
You can also create subfolders at this point; Github will understand that if you use a / in the filename box, you are indicating a folder: if you typed subfolder-name-goes-here/my-new-file.md it will automatically create my-new-file.md in the subfolder-name-goes-here subfolder. This video illustrates the process.
When you are making a new text file on Github, you can specify headers, links, images, bullets, blockquotes and so on by using markdown conventions
When you’re finished editing, hit the green commit button.
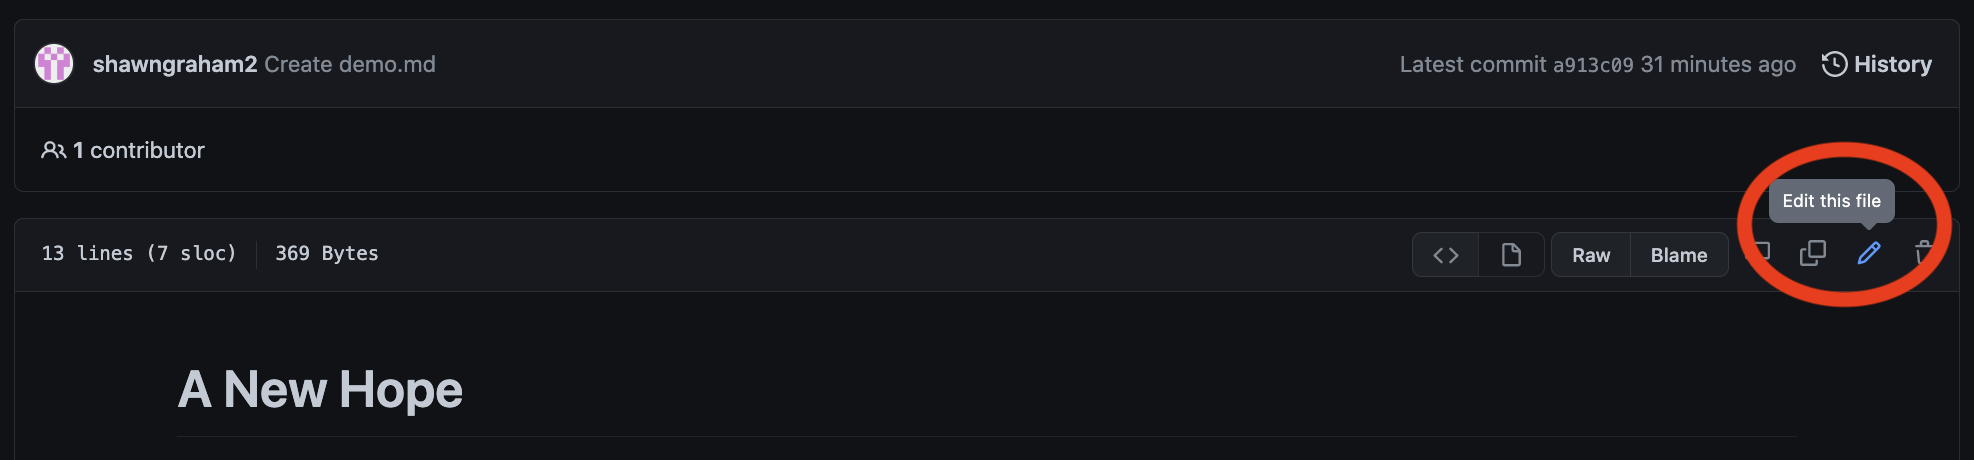
If you want to edit an existing file, click on the pencil icon:
The video below is a bit out of date, but gives you a sense of the whole sequence. It might be a bit clearer on youtube itself.
Uploading a file into Github
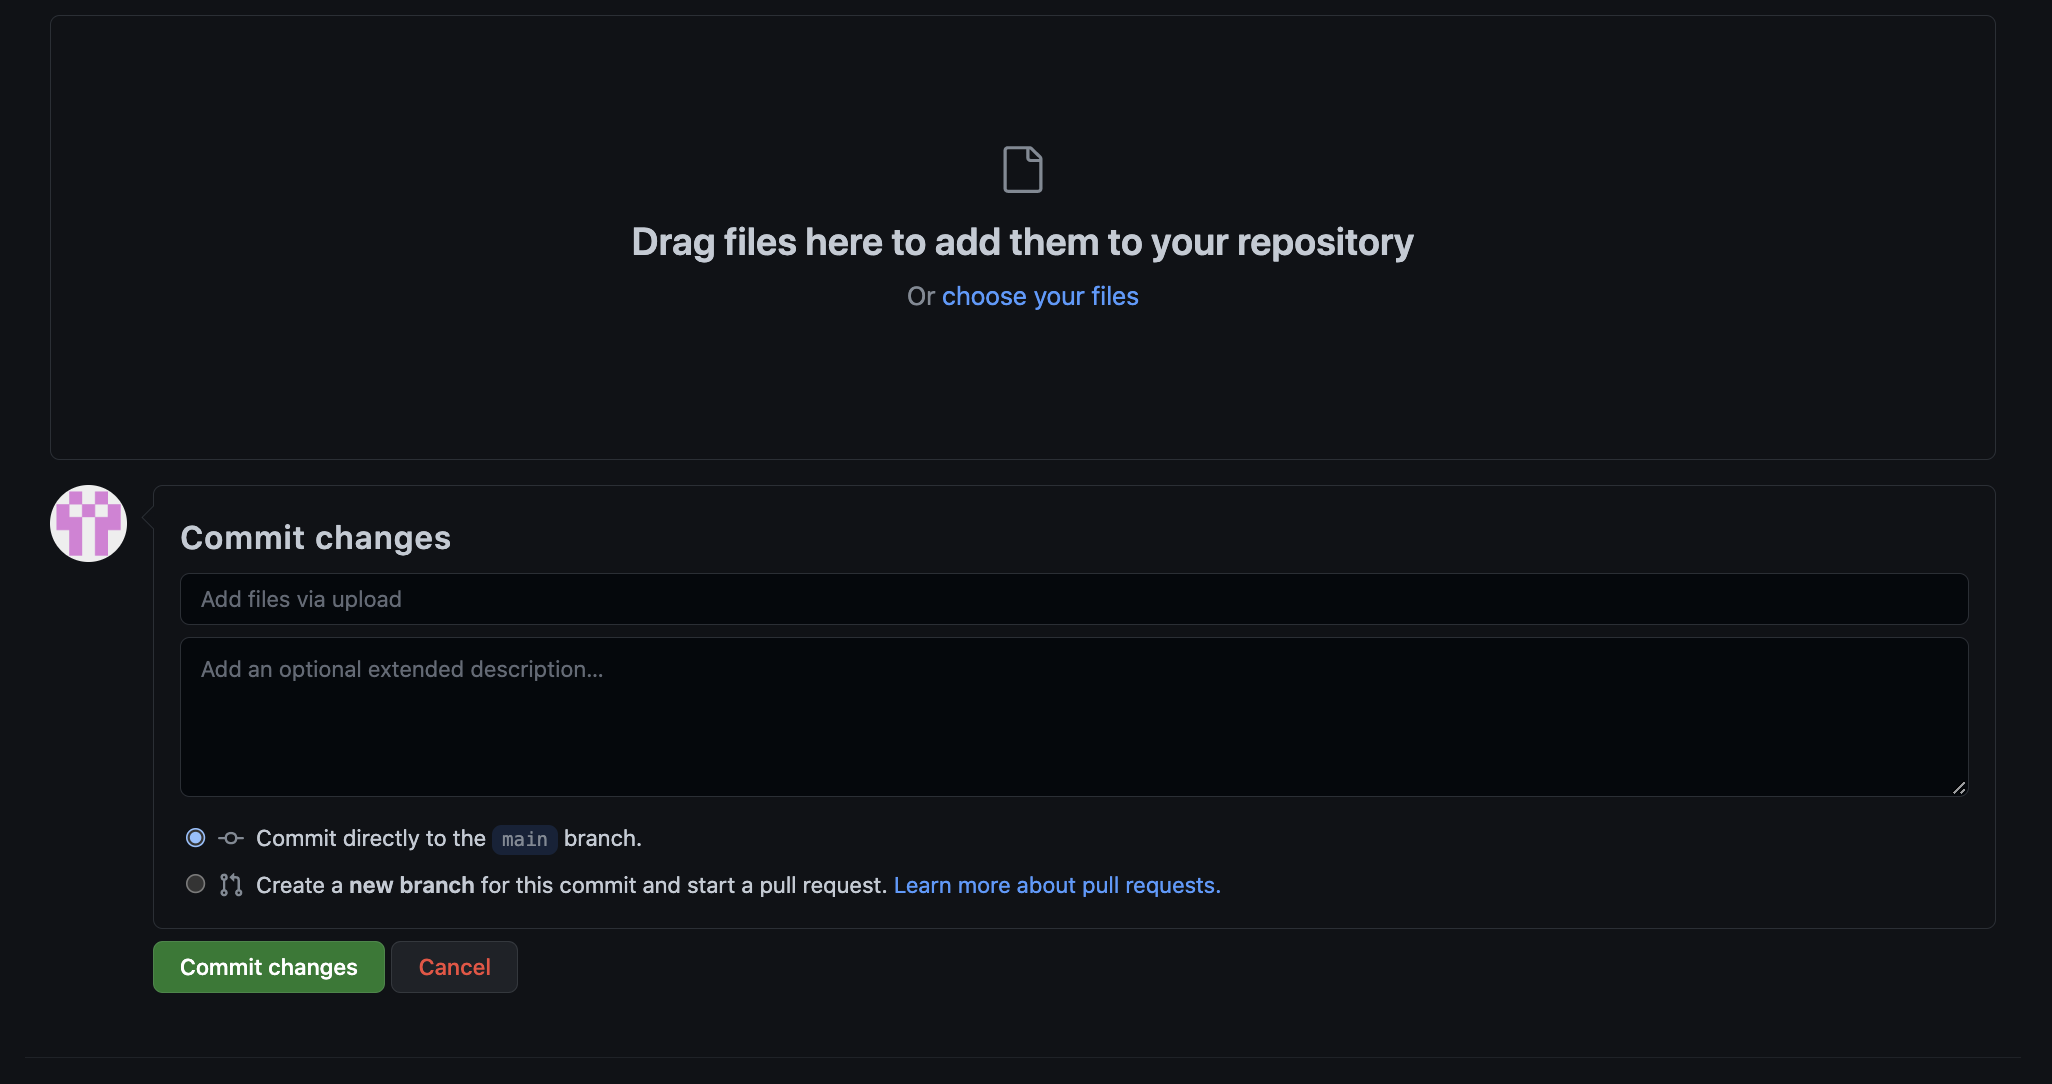
You can add new files from your computer by dragging and dropping them into the main repository (ie, the screen on github that displays all of the files in the repository as a list).
Click on the ‘add file’ button for your repository, and select ‘upload new file’. Drag and drop the file you want onto the upload pane. Wait for it to finish uploading. You can do multiple files, if you want. Once everything is uploaded you must hit the green commit button to complete the process.
Setting Up Your Course Repo
I have made a repo with subfolders and templates for you to use to keep your course materials organized. It is at https://github.com/shawngraham/hist3814a-starter. There are two ways that you can take a copy of this repo to use.
Option one, while logged into Github, you click on the ‘Fork’ button at the top right of my repo’s page. If you do this you will get a copy of my repo under your username, but you cannot make it private.
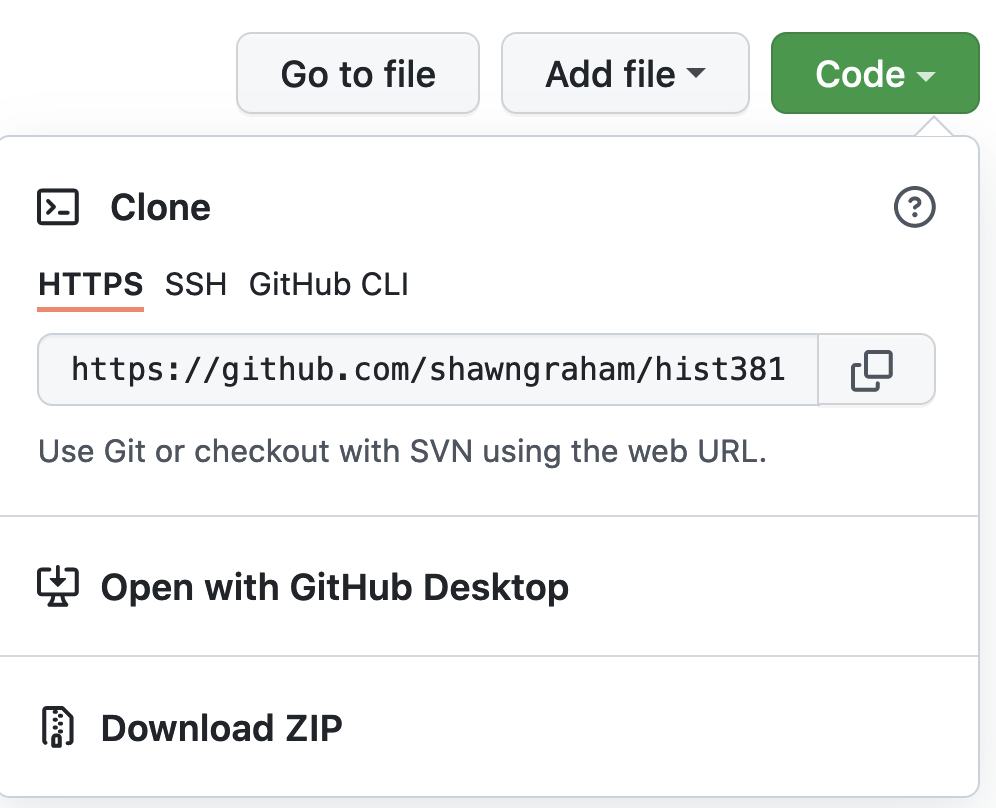
Option two which I recommend: when you are logged in to github and are on my repo page, click the green ‘code’ button, and select ‘download zip’.
You can unzip this folder onto your machine. Then, as you work through the course, any files you create as a result of doing the tutorials can be kept in the appropriate folder. There are also log.md and reflection.md text files that you can use as templates for the required log and reflection pieces. Open those with a proper text editor like sublime text or atom (https://atom.io) or notepad++.
Then, in the private repo you created on github earlier, make a new file and call it part-one/readme.md. Yes, the slash is part of the filename; github will understand that you want to make a folder and put a new file called readme.md into it. In the file editor window, put something like ‘a folder for my part one files.’
Commit the changes.
Now, you can upload anything that you create as part of part one to your online github repository. Do this for the remainder of the course.
Setting up a ‘repository’ but you forgot to initialize
In the screenshot below, I created a new repository but oops! I forgot to initialize it, and now I’m looking at this page in despair:
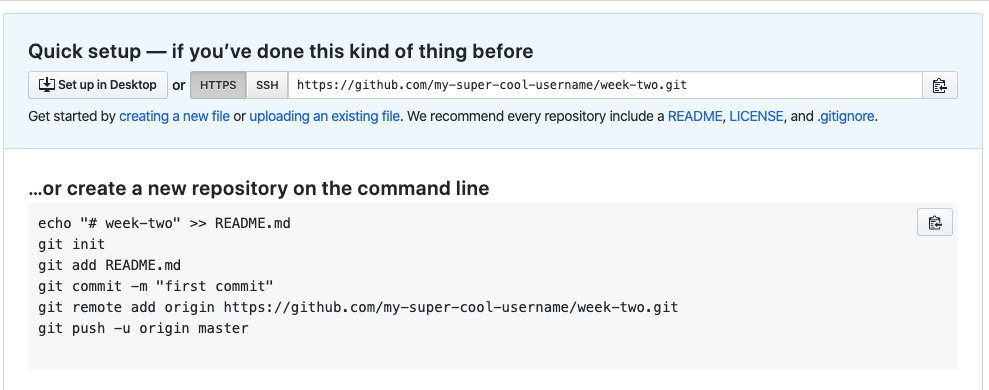
If you didn’t tick the initialize box, you’ve embarked on a path for interacting with Github via the git program that you have to install on your computer.
I used to include an awful lot of steps here. But if you’re brand new to working with github and digital history in general, frankly you’re better off just starting the whole process over again and remembering to tick off the ‘initialize with a readme.md’ box this time.
This is because an ‘uninitialized’ git repo is one that is waiting for you to connect a folder on your personal machine to the space set aside for it on github, and to do that, you need to install Git and do a bunch of configuration operations. And for the purposes of this class, we do not need to do that.
If however you want to explore using git and github from your command line or terminal, mac folks start here and windows folks start here, then check out some more github.
If those don’t cut it, you can give this walkthrough a try; once you have git installed and configured on your machine, you would run the commands in the screenshot above from the terminal. Windows folks can give this a try and again, once you get git configured on your machine, run the commands from the screenshot.
Going further
Github can also be used to run an entire website, generated from your text files. In fact, that’s how I built this course website!
If you’re new to all this, your best bet is to follow the guidance here
If you want to tinker, make a new public repo. Make a file, call it index.md and put whatever content you want in that. Go to the repo settings, and click on ‘Pages’ from the menu. Under ‘source’ click the drop down to select whatever default is there (probably will be ‘main’). Select a theme. Github will publish your site to your-user-name.github.io/name-of-your-repo. Add more content to your repo, and github will (after some delay) rebuild and republish your site. Instant website!
The following three links are from my HIST4806a 2020 seminar on digital history and museums. The particular details are a bit dated now, but they will walk you through the general workflow for how to use your Github account to serve up a professional scholarly website. You can use this scholarly website to host your reflections and course work, if you want (again, some of the minor details might have changed, but the general flow is still the same; this kind of thing always happens with digital work). Follow these three pages in order: